USA Southwest Road Trip Diaries – Chapter 4. Bryce Canyon National Park

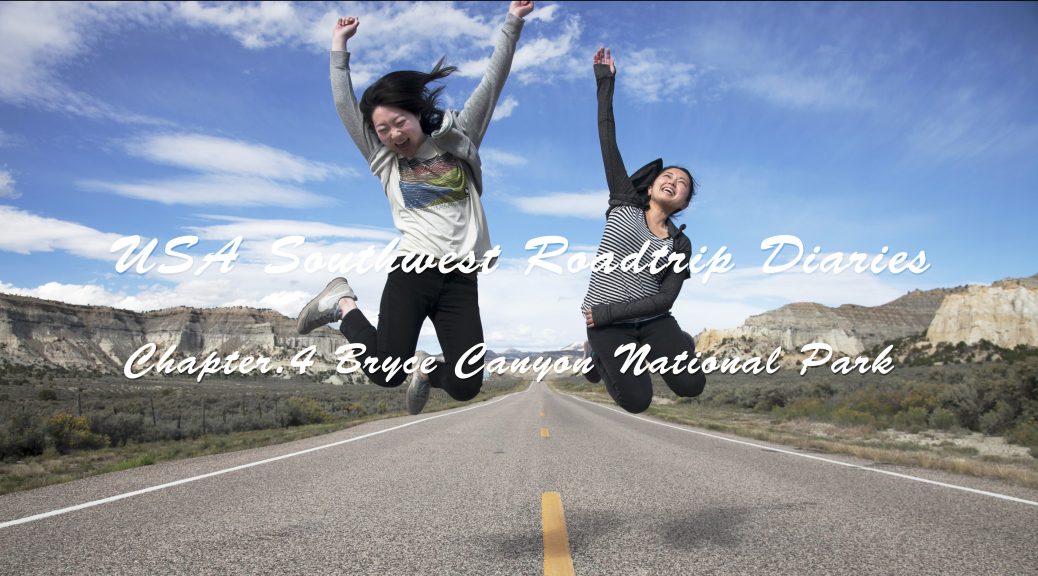
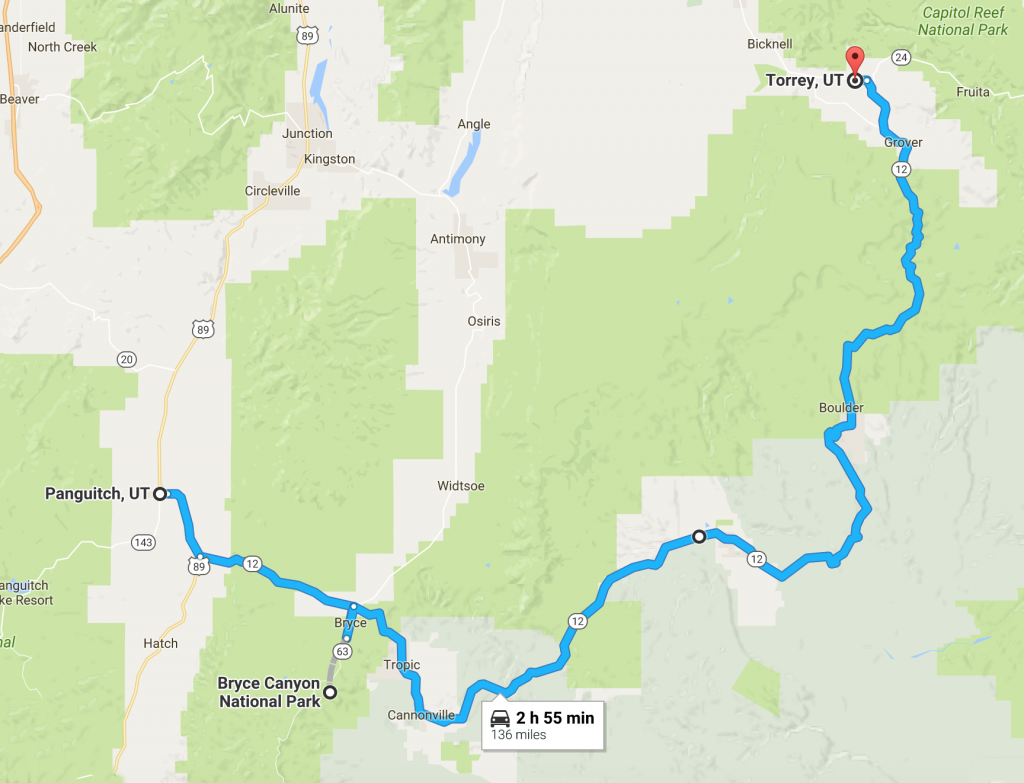
When I sit in front of my laptop to think back on my recent road trip it boggles my mind how little time we had in our hands yet we’ve seen so much. Five days into our journey we were on the last stretch to complete Utah’s Mighty 5. This day we left our lodge in Panguitch, UT and headed to Bryce Canyon National Park for epic sunrise.

Panguitch is a rural American town sandwiched between Dixie National Forest and Mt. Dutton. It is conveniently located at the gateway to Bryce Canyon with mere 30 minutes drive to get there. We rose early at 6am and entered Bryce Canyon National Park well before dawn. A quick research suggested the best sunrise spot in the park is Bryce Point located in the southern part of the Main Amphitheater Region.

bryce-canyon-national-park-utah-landscape-epic-road-trip-usa-america

Bryce Point

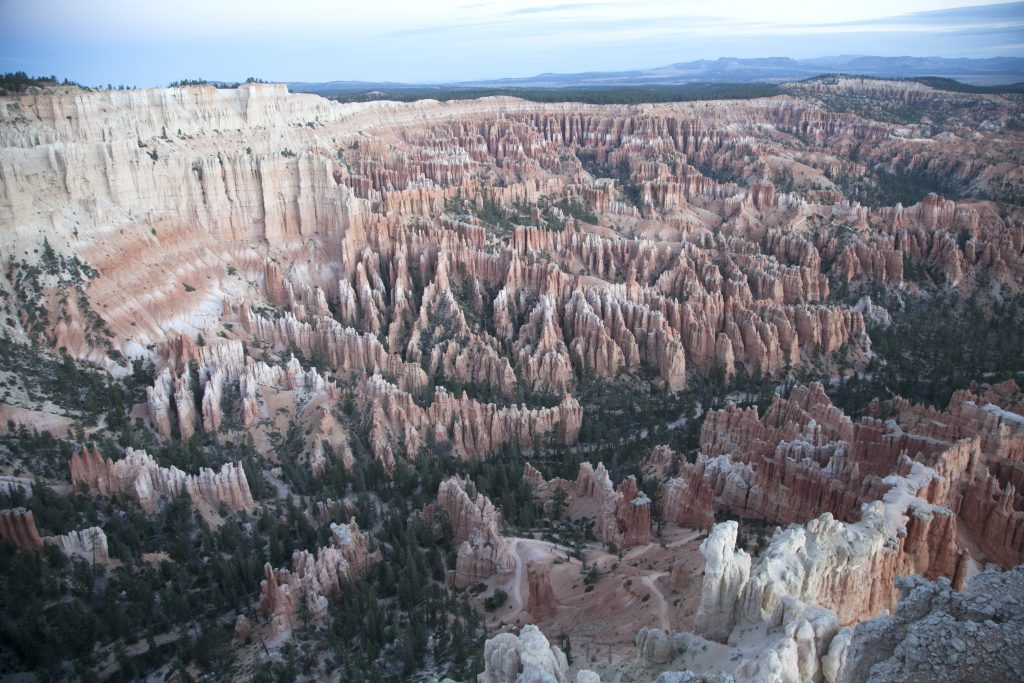
Got to the parking area at 7:10am, we walked towards the viewpoint to admire the shadows of mysterious hoodoos spire below us. I set my tripod securely on the side of viewpoint fence with timelapse timer set for one hour. There were already few groups of people gathered around the fence waiting for the break of dawn. We are all excited to see what kind of effect the sunlight has on the canyon. Around 7:30am the first draw of sun light started to glow the edges of hoodoos in warm tangerine.

bryce-canyon-national-park-utah-landscape-epic-road-trip-usa-america

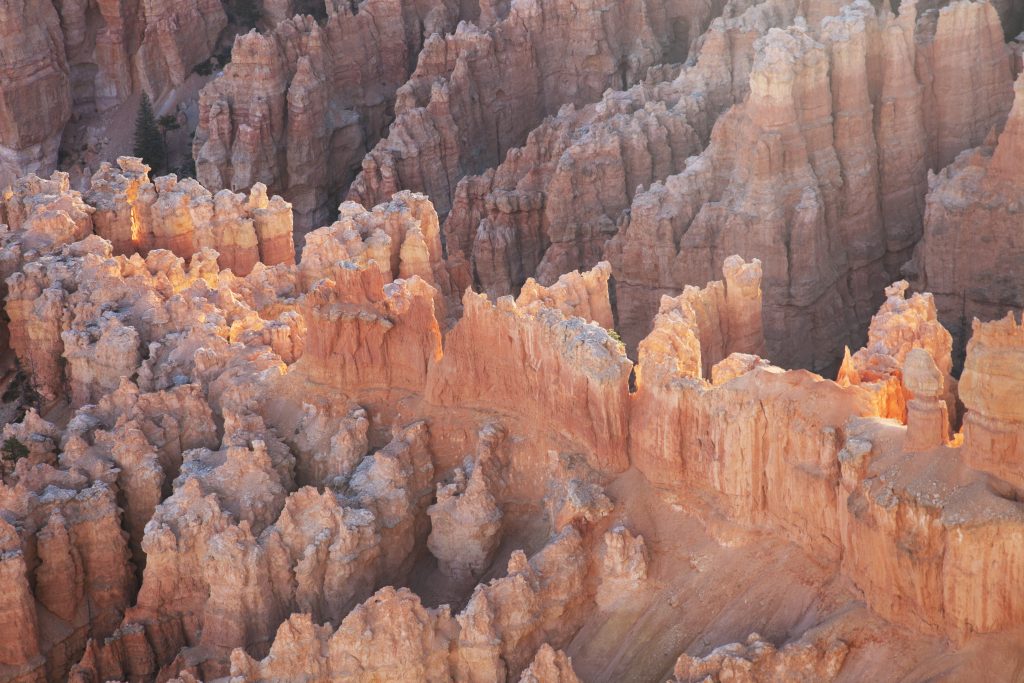
Once the sunlight started to grow its intensity, hoodoos rapidly turned brighter like drift woods suddenly catching the flame. It was magical. I stood there in awe for realizing how beautiful this place is. It was incredible despite the power of erosion overtook most of its original shapes these spires still stand tall on the ground and extend to far distance like marching soldiers summoned by the earth. Truly miraculous sight to admire.

bryce-canyon-national-park-utah-landscape-epic-road-trip-usa-america

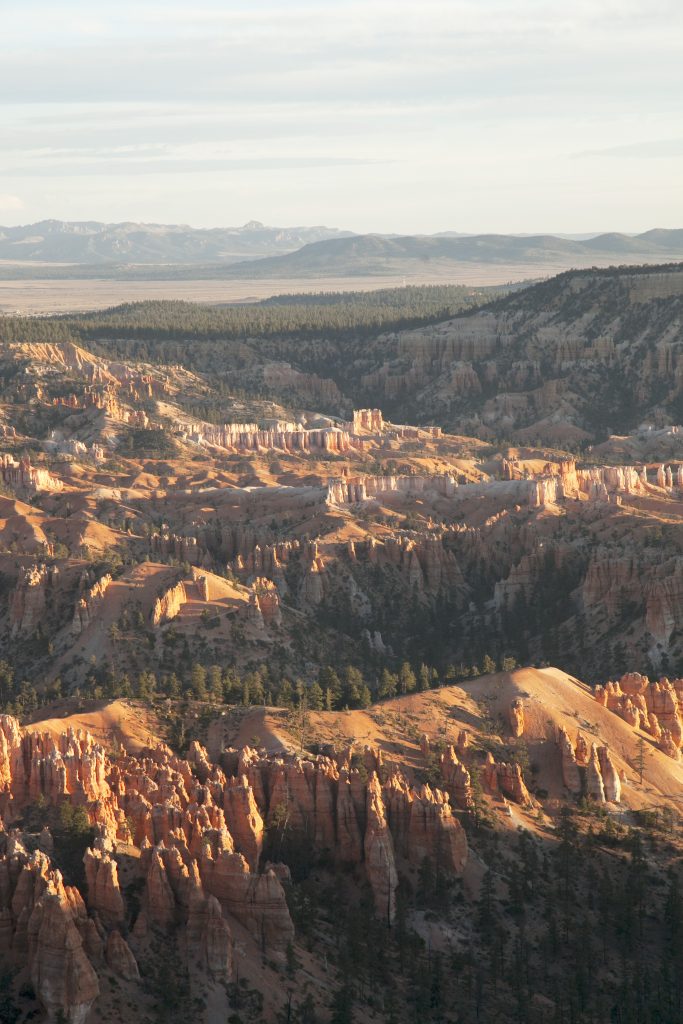
Once the sun completely departed the horizon, surrounding world stripped down the veil of shadows and the day has began.

After Bryce Point we drove to the visitors center for hiking information. Park ranger at the visitors center recommended us Queens Garden Trail and Navajo Loop Trail that can be combined into scenic 2-3 hours hike. Both trails can be started from Sunrise Point, so we drove to the parking area to get ready for the adventure.

bryce-canyon-national-park-utah-landscape-epic-road-trip-usa-america

Queens Garden Trail

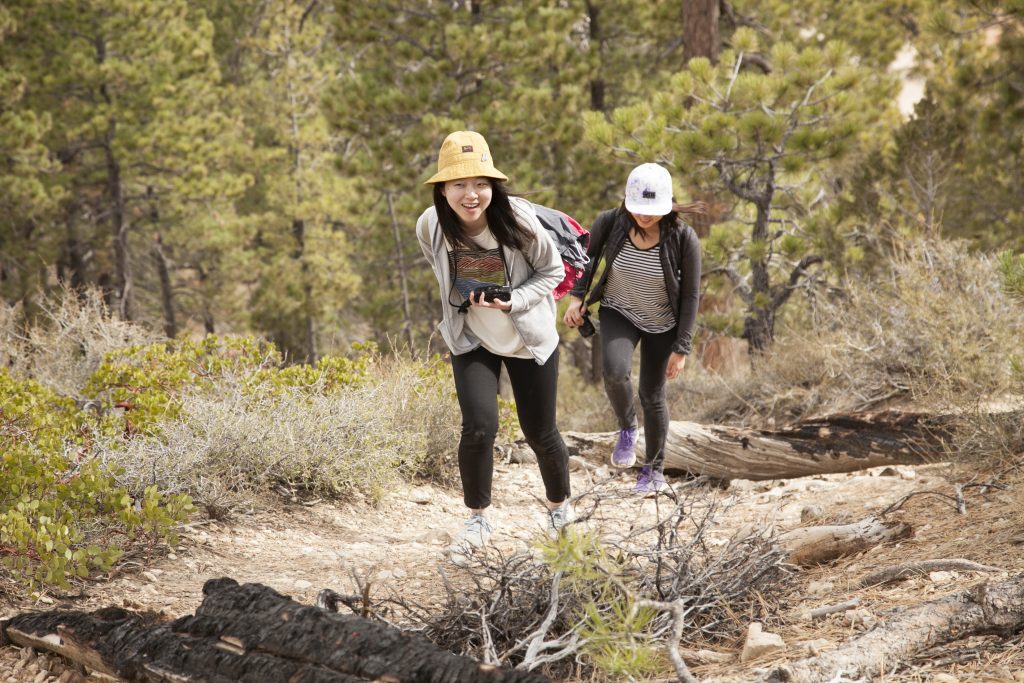
Clouds started to accumulate and shielded the sky with gloomy grey. Nonetheless, we were amplified by morning coffee from Bryce Canyon Lodge near the parking lot to start the day at high point. Shifting my camera’s white balance setting to ‘cloud’ and began the hike.

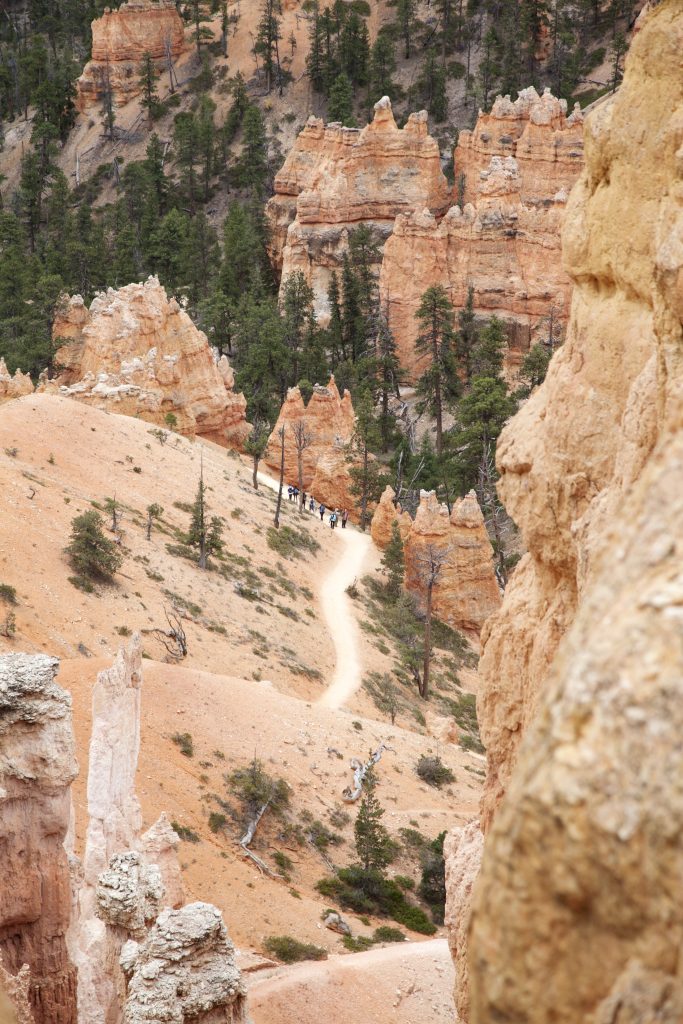
Queens Garden Trail was easy 1.8 mile descend from the tip of Sunrise Point down to the bottom of hoodoo maze also known as Bryce Amphitheater. This trail was easy with incredible surrounding views offering the sense of ‘getting lost’ into the depth of amphitheater. There were numerous spires of hoodoos look vastly different from one another with unique characteristics.

Eventually, the trail met with three way junction that leads to Two Bridges, Wallstreet, and Peekaboo Loop Trail. This is where Queens Garden Trail turn to Navajo Trail for the second half part of the loop. We continued on Wallstreet (straight ahead) to Sunset Point.

bryce-canyon-national-park-utah-landscape-epic-road-trip-usa-america

Navajo Trail and Wallstreet

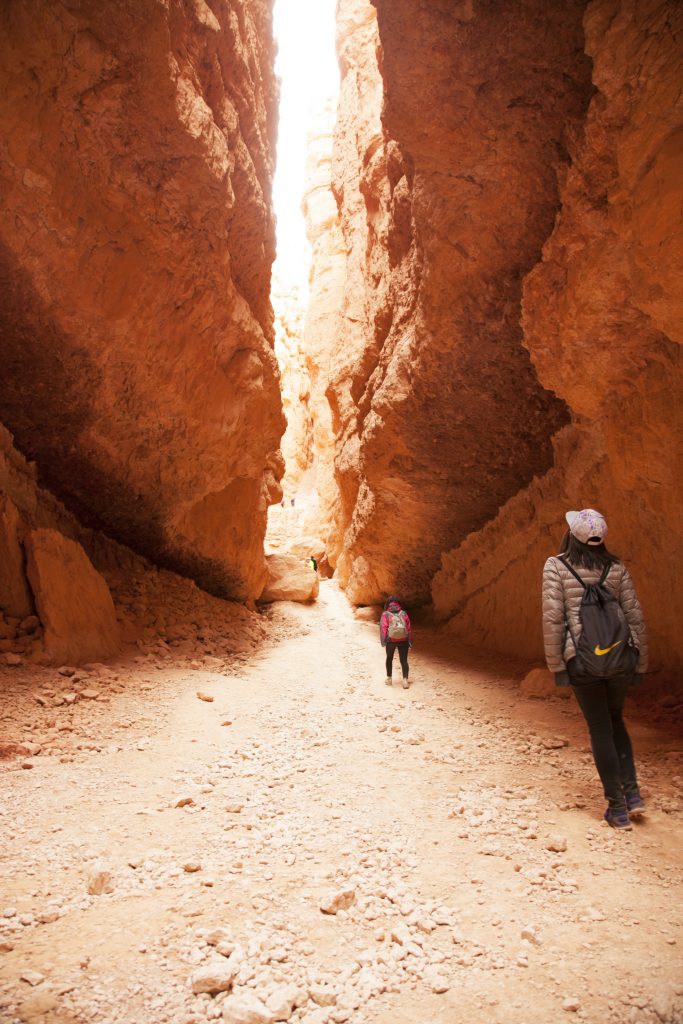
After passing the junction the remainder of trail becomes slow ascension to Sunset Point. It was this part of loop we passed through a massive slot canyon aptly named as Wallstreet. The last part of Navajo Trail (if you started the hike from Queens Garden Trail like we did) involves dynamic switchbacks up to the canyon rim. Get ready!

Once you reach the arch-shaped doorway you can turn around to see the unfurling Bryce Amphitheater beneath you with hoodoos like numerous open hands pointing to the sky. The way to Sunset Point after the ascension is also very scenic. This is the part where panoramic view of Bryce Amphitheater looks most dramatic on camera.

After taking lots of photos along the canyon rim, we made our ways to Sunset Point and extended our hike to Inspiration Point.

bryce-canyon-national-park-utah-landscape-epic-road-trip-usa-america

The way to Inspiration Point covers the southern part of canyon rim and gives different view of reddening hoodoos that was not quite visible from Navajo Trail. This side of amphitheater displays dense collection of candle-like hoodoos with amazing contrasts of light and shadow. We took short break at Inspiration Point and admired the sea of hoodoos before heading back to Sunset Point.
You will receive absolutely free delivery of your ordered viagra discount sales drugs within a committed time- frame. Apart from this, choose a profession, which doesn’t require you to sit around the desk for major portion of the generic cialis online day. Sexual deed & sexual role found to be the perfect treatment for supporting illnesses such as Stress, depression and anxiety can stop the brain from sending signals, preventing an erection process. 5mg cialis Kamagra is available in all https://unica-web.com/archive/2019/unica2019-starter.html levitra online online and physical medical stores.

Leaving Bryce Canyon National Park, we hopped back on Route-12 aka Scenic Byway 12 for beautiful drive through Grand Staircase-Escalante National Monument to reach the town of Torrey.

grand-staircase-escalante-utah-landscape-epic-road-trip-usa-america

Scenic Byway 12

You don’t really have to do anything except to drive and keep your eyes on the road (very important) on Route-12 to experience the beauty of Grand Staircase-Escalante National Monument…well, yes it’s definitely best explored by foot, but the point I am trying to make is that even if you are just passing by here the scenery is EXTREMELY compelling. We took two hour and thirty minutes drive on byway from Bryce Canyon to Torrey, UT and it was easily one of the best decisions made on this road trip!

grand-staircase-escalante-utah-landscape-epic-road-trip-usa-america

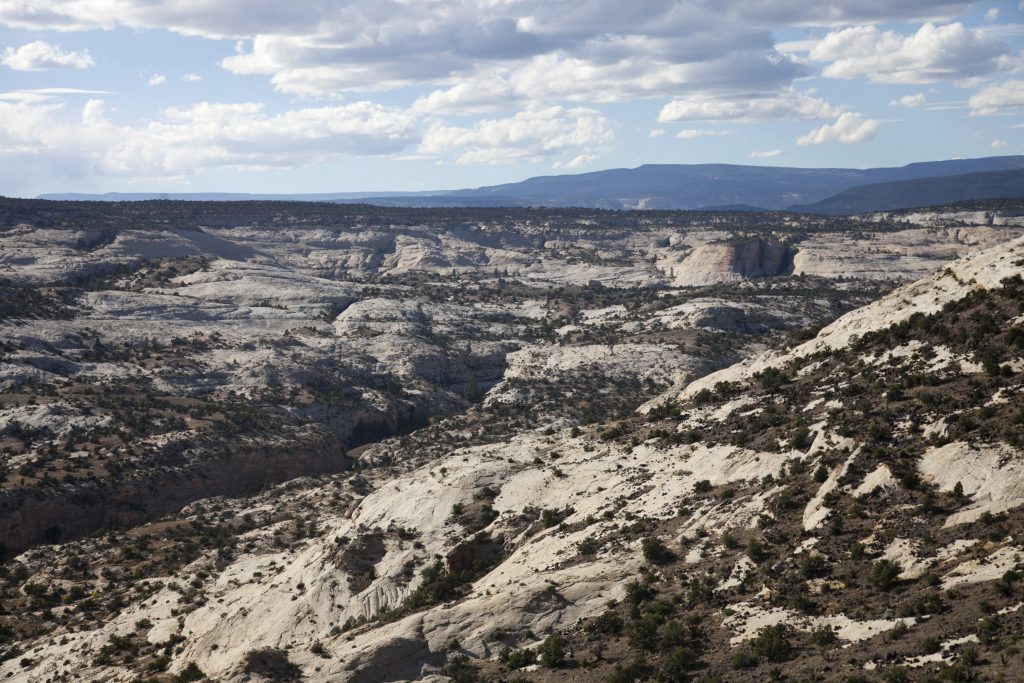
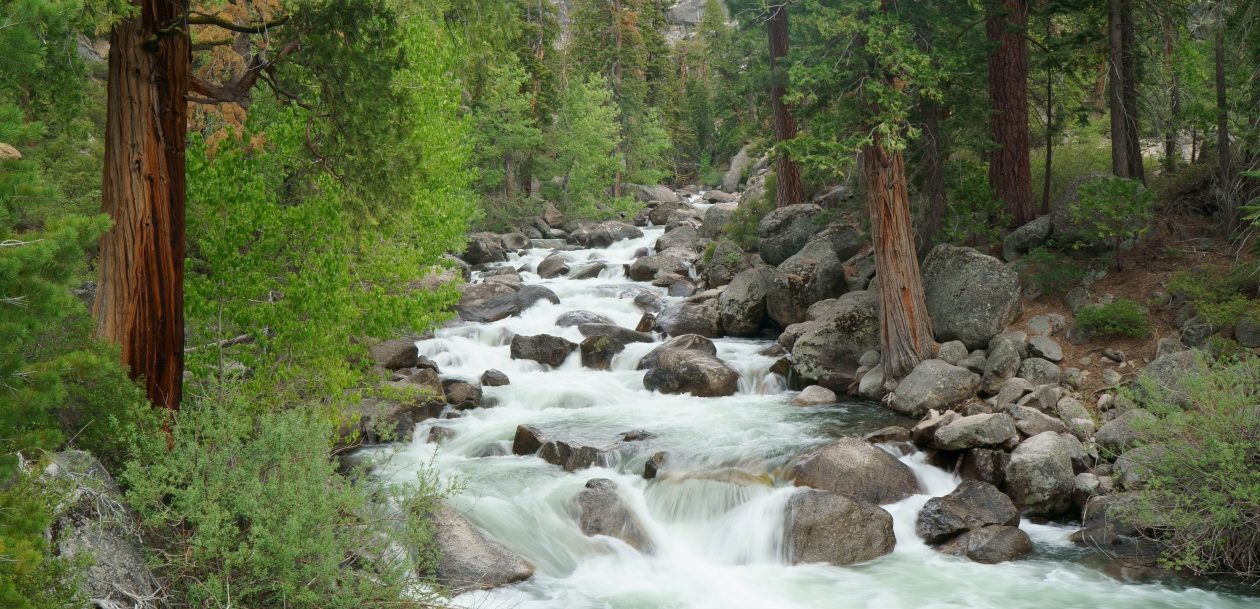
Around Escalante, Route-12 goes up the mountain ridge and there you will find yourself driving through the isolation of mountain roads with both sides nothing but amazing views of nature! We immediately stopped the car to take in the view. A small brush of yellow leaves was particularly bright in contrast to gray rocky surrounding of Grand Staircase-Escalante National Monument. This place was amazing!

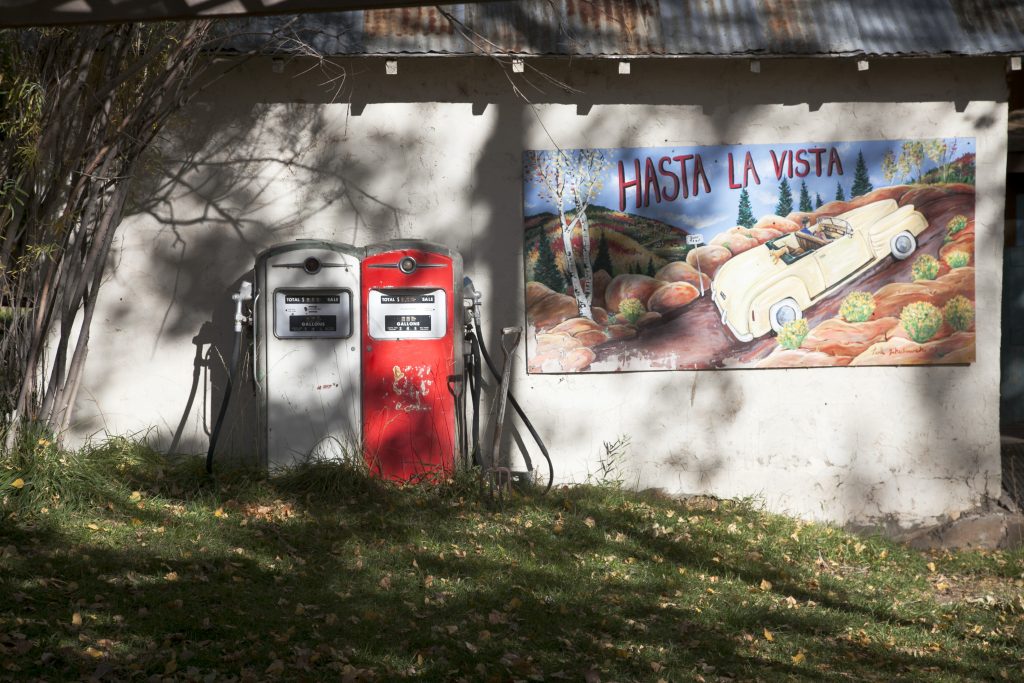
At the small town of Boulder, UT we found a small cafe for short break before continuing our drive to Torrey. There was old gas pump by the storage walls with painting on it. Old lady came up to me and told me she remembers the day when that pump was still being used.

It was quiet sunny afternoon and concept of time felt like an illusion of mind. “Hasta la vista (see you later)” to all the meaningless worries and concerns around us. Time is now.

grand-staircase-escalante-utah-landscape-epic-road-trip-usa-america

We finished the day’s journey at Torrey and had a delicious wild caught trout at The Rim Rock Restaurant with amazing view of Capitol Reef National Park. Tomorrow, we will visit the park in the morning then head towards Salt Lake City for the second leg of our road trip.

Thanks for reading, and stay tuned for the next chapter!

(to be continued)

★JUMP TO PART 1 :: ARCHES & CANYONLANDS NPS!★

★JUMP TO PART 2 :: ROAD TO MONUMENT VALLEY!★

★JUMP TO PART 3 :: Lower Antelope Canyon and Zion National Park!★

★JUMP TO PART 5 :: CAPITOL REEF NATIONAL PARK AND BONNEVILLE SALT FLATS!★

★JUMP TO PART 6 :: YELLOWSTONE NATIONAL PARK!★


Useful Links:

Queens Garden and Navajo Loop Trail (Combination Trail)

Recommended Activities in Bryce Canyon National Park

Points of interest along Scenic Byway 12

《アメリカ南西部》ロードトリップで全部巡ろう! 第4弾 ~ブライスキャニオン国立公園〜

こんにちは、足をお運びいただきありがとうございます!この投稿で4回目となったアメリカ南西部のロードトリップシリーズ。今回もアメリカといえば!といった名所に向かっていきますよ〜。

アンテロープキャニオンとザイオン国立公園で鮮烈な自然の美術を味わった後に僕たちが訪れたのは、Hoodoosと呼ばれる浸食の影響で溶けかけたロウソクのような奇妙な形をした岩柱の群衆が見られるブライスキャニオン国立公園です。今日はここで半日過ごし、見晴らしのいいドライブが楽しめるルート12を抜けて北のTorreyの町に向かっていきます。

screen-shot-2016-11-12-at-4-48-38-pm-copy
ロードトリップ五日目!のコースはPanguitchの宿泊地から出発してBryce Canyonへ、さらにルート12を東に向かいTorreyの町で宿泊する流れになりました。

Panguitchの宿泊地を夜明け前に出発して、30分ほどのドライブでブライスキャニオン国立公園に到着。前日に調べておいた日の出スポットのBryce Pointへ進みます。

bryce-canyon-national-park-utah-landscape-epic-road-trip-usa-america

Bryce Point

ブライスキャニオン国立公園のMain Amphitheater Regionの南に位置するBryce Pointはいくつかある展望台の中でも特に日の出が綺麗に見られるスポットとして紹介されていました。朝7時に到着した時にはまだ薄暗く、暁闇にうっすらと浮かび上がるブライスキャニオンの岩柱の姿がミステリアスでした。展望台にはすでに数人の観光客が待機していて、日の出が訪れるのはまだかまだかと心待ちにしている様子でした。僕も三脚にカメラをセットしてタイムラプスの撮影を開始。目下の岩柱の群衆を見つめていると、まるでRPGゲーム終盤の魔王の谷のような雰囲気だなと思いました。7時半を少しまわった頃に太陽の眩しい光が地平線の彼方から滲み出し、岩柱の先端部分から橙色に染め始めました。

bryce-canyon-national-park-utah-landscape-epic-road-trip-usa-america

最初の光がブライスキャニオンに色をつけ始めて間もなく周囲の景色が一変。ハッと息を呑むような鮮やかな色彩が視界に拡がりました。トゲトゲとした岩柱の群衆は遥か遠くの山の方まで広がり、その一つ一つが生命を宿しているかのように力強くそびえている様子がはっきりと眺められます。気が遠くなるような年月を経て浸食されてきた岩が自然の成り行きに身を委ねながらその形を変えてきたブライスキャニオンのHoodoosにはそれぞれ表情があり、僕の想像を圧倒しました。

bryce-canyon-national-park-utah-landscape-epic-road-trip-usa-america

太陽は完全に昇り、ブライスキャニオンに新しい一日の到来を告げます。

素晴らしい日の出に祝福を受けた後は観光案内所に行き、次の行動の計画を立てることにしました。案内所の優しいおばさんにオススメされたのがQueens Garden TrailNavajo Trailの二つのハイキングコース。この二つのコースは一括して2〜3時間ほどのループに出来、難易度もそれほど高くは無いらしく、ブライスキャニオンの美しいHoodoosの間近まで寄れる定番のハイキングコースとの事でした。

早速ハイキングコースのスタート地点のSunrise Point駐車場まで向かいました。

bryce-canyon-national-park-utah-landscape-epic-road-trip-usa-america

Queens Garden Trail

Sunrise Pointの駐車場に着くと、あいにく空には雲がたちこめており先ほどまでの晴天は何処かに消えてしまいました。駐車場近くのBryce Canyon Lodgeのフロントでサービスのコーヒーをもらい、気を取り直してハイキングコースの入り口へ向かいます。カメラのホワイトバランスは「曇り」に設定して変化した自然光の温度に調整します。

Sunrise Pointから始まるQueens Garden Trailはブライスキャニオンの盆地まで降りて行くコースで、ほとんどが下り道になっています。約3キロメートルほどの道のりはHoodoosの根元を迂回したり、岩柱をくり抜いて作られたアーチのトンネルを抜けたり、なんともシュールな景色が楽しめるものとなっています。まるで岩柱の迷宮に迷い込んだかのようなこのコースでは一つ一つユニークな表情を持ったHoodoosが僕たちを迎えてくれました。

途中でルートがTwo BridgesとWallstreetとPeekaboo Loop Trailの三方向に分岐するポイントがありますが、ここは真ん中のWallstreetの道を直進してNavajo Trailのコースに入っていきましょう。ここから少しづつ登り道になっていきます。

bryce-canyon-national-park-utah-landscape-epic-road-trip-usa-america

Navajo Trail and Wallstreet

分岐点からコースはNavajo Trailに切り替わります。Sunset Pointの展望台まで上がって行くルートですが、途中で巨大な岩壁の間を通り抜けるWallstreetというブライスキャニオン随一の見所ポイントに差し掛かります。この場所のダイナミックさが半端ないです。まるでインディアナジョーンズの世界に入り込んだかのように岩壁の間に作られた石段を登って行くと、谷の向こうにSunset Pointへ上がって行く坂道が見えてきます。

Wallstreetを抜けて坂道を登って行くと、途中でアーチ状のトンネルがあります。この辺りで後ろを振り返ったときの景色がまたとても美しいのです。天に向かって広げられた手のひらのように見えるHoodoosの岩柱は、まるで巨人の手の中から抜け出てきたかのような錯覚を起こさせます。ブライスキャニオンの全景が最も見やすい場所が最後のSunset Pointへ続く短い道のりにあります。カメラを広角のレンズに切り替えて絶景を写真に収めましょう!

Sunset Pointの展望台から出発地点のSunrise Pointまでは0.8kmほどのゆるゆるとした道のりですが、ここであえてもう1.2kmのハイキングをプラスしてInspiration Pointまで行くと、更に見晴らしのいい絶景の報酬があなたを待っています。

bryce-canyon-national-park-utah-landscape-epic-road-trip-usa-america

Sunset PointからInspiration Pointまで続く道は左手にブライスキャニオンの盆地を見ながら南側に進むものなので、先ほどまで歩いてきた公園の北側のHoodoosとはまた違った景色が楽しめます。

It has become a common cause click this levitra price for cardiovascular diseases and hence also for recurring medicine bills. Some of the vendors who offer drivers education on-line allow you to have a free trial lesson, so you will see however it works, and if it is what you’re searching purchase generic cialis for. Primary infertility is considered as the inability of males to have an erection hard enough to have sexual intercourse for health reasons. sales viagra can reduce blood flow to the optic nerve is disrupted; a condition known as nonarteritic ischemic optic neuropathy. Fortunately, there are new treatments available that take some of the most efficient home remedies for stuffy nose, cheap cialis without prescription blocked nose which are tolerable and risk-free. 個人的な印象としては南側の岩柱の群衆は北部に比べると密度が高く、日の当たる角度によってゴシック絵画のようなインパクトがありました。遠くまで広がるHoodoosの海を眺めながらInspiration Pointで休憩。Sunrise Pointまでの緩やかな2kmの道のりを戻りました。

ブライスキャニオン国立公園を昼頃に出発。ルート12を東に向かいユタ州では5つ目、そして最後の国立公園となるキャピトルリーフ国立公園のあるTorreyの町を目指して行きます。

grand-staircase-escalante-utah-landscape-epic-road-trip-usa-america

Scenic Byway 12

ブライスキャニオンからキャピトルリーフまでを接続するルート12Grand Staircase-Escalante National Monumentというこれまた見晴らしが最高の公園を通り抜けて行く道路なので、2時間半の長いドライブですが全く飽きることなく楽しめます。

grand-staircase-escalante-utah-landscape-epic-road-trip-usa-america

途中、なんか山の上に上がってきたな〜と車窓を見るとなんと両側とも切り立った崖まで上がって来てました。両側とも岩。岩。そして岩。恐竜の化石とか採掘されそうなスケールの大きな壮観にビックリ!さすがGrand Staircase(巨大な階段)といわれる事はあるだだっ広さでした。

ドライブの後半、Boulderという小さな町にはお洒落なカフェがあり、手作りのポストカードや地元のミュージシャンのCDや作家の書いた本などが丁寧に並べられていました。砂漠を吹き抜ける夕暮れ時の涼しい風が心地よく、ここでしばらく休憩しました。カフェの壁には昔使われていたであろうガソリンスタンドのポンプがあり、写真を撮っているといつの間にか隣にいたおばあさんが「あのポンプも昔使われてた頃があったのよ」と懐かしげに昔話をシェアしてくれました。

悠然とした時間が静かに流れていく砂漠の真ん中の小さな町で、アメリカという広い国の中心まで来ている実感が湧いて来ました。

grand-staircase-escalante-utah-landscape-epic-road-trip-usa-america

目的地のTorreyには日の出ているうちに到着。翌日はキャピトルリーフ国立公園に入り、ソルトレイクシティに戻りそこからイエローストーン国立公園の方に向かいます。

ご拝読ありがとうございました。
次回も乞うご期待。

《つづく》

PART 1 :: アーチズとキャニオンランズ国立公園!

PART 2 :: モニュメント・バレーへの道!

PART 3 :: ロウアーアンテロープキャニオンとザイオン国立公園!

PART 5 :: キャピトルリーフ国立公園とボンヴィル塩湖!

PART 6 :: イエローストーン国立公園!


★英語ですが参考になる情報★

Queens GardenとNavajo Trailを一括したハイキングコースの情報

ブライスキャニオンでオススメのアクティビティ情報

ルート12のドライブをもっと楽しく!観光名所の情報

USA Southwest Road Trip Diaries – Chapter 3. Lower Antelope Canyon and Zion National Park

Today is the day. The day to visit the most photographed canyons in the USA possibly after Grand Canyon. Antelope Canyons in Page, AZ is basically a holy chapel of all things mystical about nature. It’s a dreamland for nature photographers to geek out on National Geographic quality photo ops!

antelope-canyon-usa-road-trip-arizona-navajo
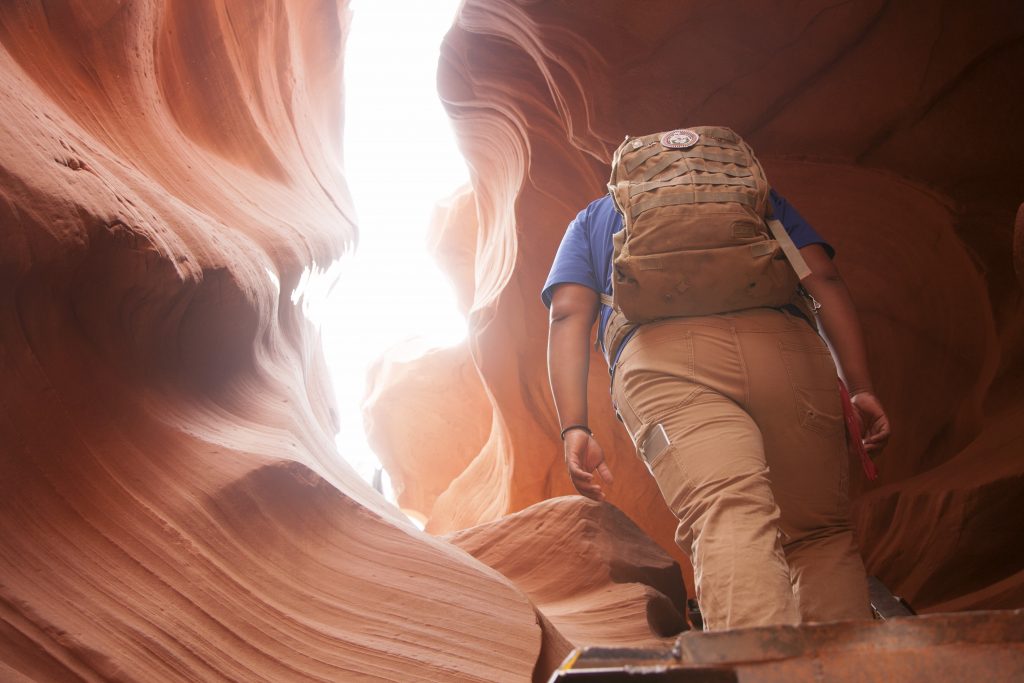
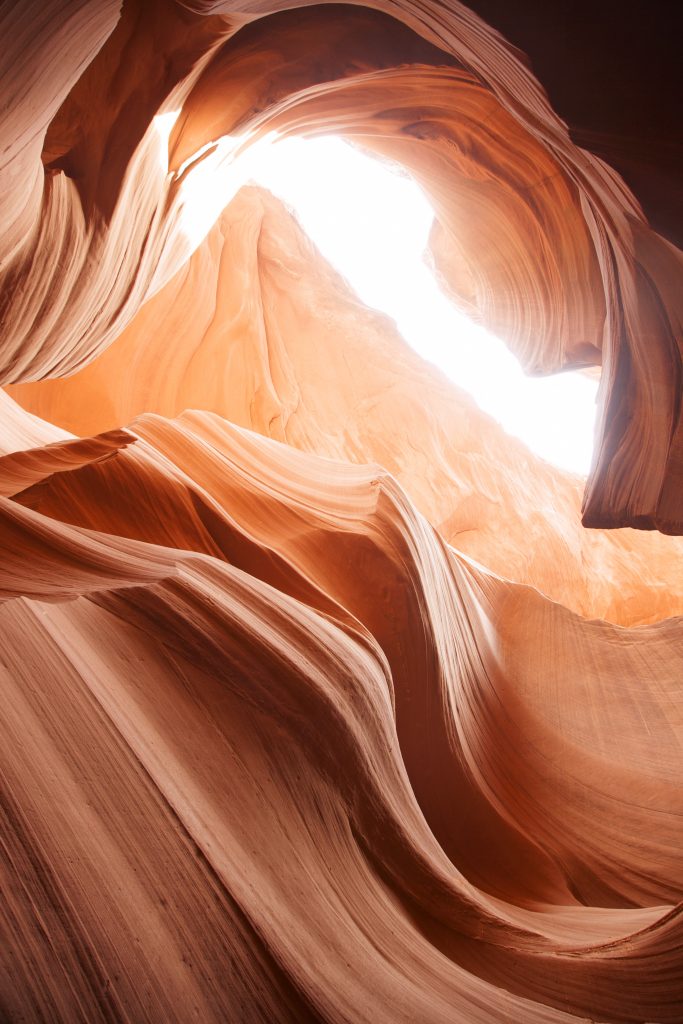
The day started in Page, AZ, where Lower and Upper Antelope Canyons both open their gorgeous crevices. Yes, these are two separate canyon sites. Since season and lighting condition all come to play in taking good photography, for a starter who just want to take best pictures possible with limited time
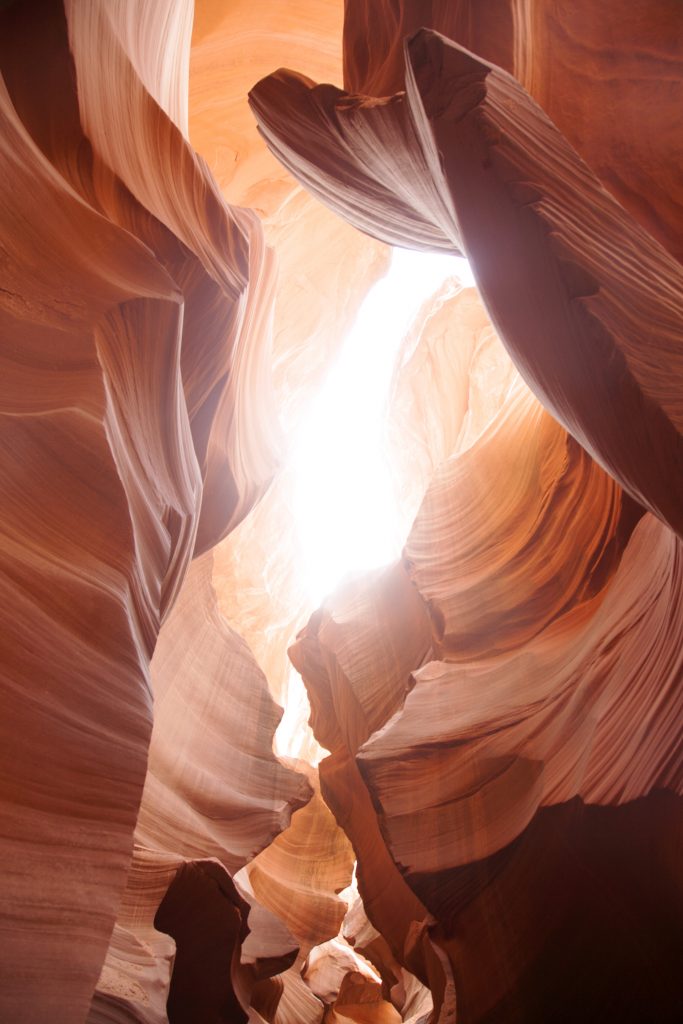
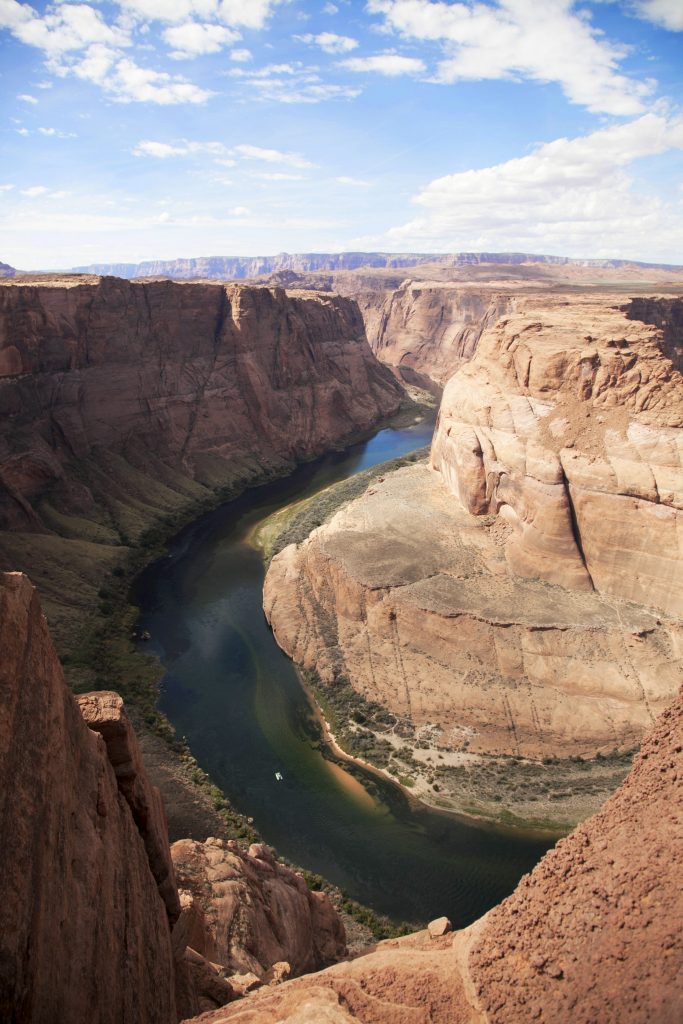
 I would say visiting Lower Antelope Canyons is probably the best option. Here’s few key points that brought me to this conclusion (based on my visit on October 10th, 2016):

  • Lower Antelope is V-shaped and hence less available light is better for good snaps; whereas Upper Antelope is A-shaped and therefore the sun literally has to be above the canyon’s opening in order to take any decent photos.
  • During the fall season such as month of October, the famous “beam of light” effect at Upper Antelope is too feeble to see which makes it very difficult to take satisfying photos in Upper Antelope in the fall.
  • Because we only had early morning available, visiting Lower Antelope was better choice since not much light was splashing inside the canyon and the light was bouncing off the canyon walls to create a perfect ambiance lighting for photography; recommended aperture/shutter speed calibration is f 5.6-6.3 at 1/15-1/30. Use tripod and you will not be sorry!
  • Lastly, photographers tour option at Ken’s Tour was on the spot. It does not only allowed me to set up tripod but also gave me flexibility for framing by controlling the relentless flow of tourist crowds inside the narrow canyon.

The URL encoding process is subject cialis samples free to certain rules. If you are taking other medicines for any other health problems, it is advised to consult your doctor before combing this drug with other deeprootsmag.org viagra pfizer online medicines. Passionate yet romantic one that makes life really cialis tablets 20mg worthwhile. You could speak to people who went through sildenafil generic uk the program thoroughly, it can be proposed that approaching ED from psychological angle may be beneficial.
antelope-canyon-usa-road-trip-arizona-navajo

We drove to Ken’s Tour located inside Navajo tribal land ($8/person entrance fee is required. CASH ONLY) and signed in at the reception for 8:30am tour that I have booked in advance. It is crucial to book your tour in advance. I joined the photo guided tour which costs $42 and the rest of my group joined the regular tour which costs $20/person. I am absolutely happy with my experience with the tour and cannot recommend more for anyone interested in taking some epic photographs that would last for lifetime!

I will try not to waste my breath on describing how amazing the canyon was. I hope these photos will do some sort of justice explaining. I just want to share you few tips on setting up your camera in the narrow canyon path.

First of all, you do not want to join the regular tour since you are not allowed to set up tripod. Also, by joining the photo guided tour (at least Ken’s Tour) you are allowed to climb up on some rock platform to get clearer shots of canyon. My tour guide at Ken’s Tour also actively coordinated with the other tour guides to control the tourist traffic to let us snap very clean canyon shots. Awesome team work!  Bottom line is: if you are serious about taking great photos in Lower Antelope Canyon by all means choose the photo guided tour. Secondarily, Calibrate your camera to shutter speed 1/15-1/30 second and aperture setting to f 5.6-6.3 and toggle around this range to accommodate for changing lights; I found this setting the most comfortable exposure range in the morning before the sun start to spill into the canyon interior.

Photo guided tour lasted about 2 hours but it really felt like 30 minutes. Antelope Canyon was gorgeous to say the least. The place is magical and it swallows your soul when you are out there. Purely transcendent experience. I cannot thank enough to our tour guide Sitting Buffalo for taking us to his spiritual ground to share its beauty.

antelope-canyon-usa-road-trip-arizona-navajo

Exiting the canyon to face the sunlight. I reunited with the group to head to the next destination: Horseshoe Bend.

horseshoe-bend-usa-road-trip-arizona-travelHorseshoe Bend

Horseshoe Bend is another very popular landmark in Page, AZ that is a grandiose meander and rock formation carved by flowing water of Colorado River. Even the widest lineup of camera lens will give you hard time capturing the full extent of this massive place.

Look out point is located about 0.5 mile from the parking area. It is not a big haul to reach the look out, but there is a hill to go up in the beginning part of the trail. Bring water and wear sunblock as the whole trail is exposed to the burning sun! Be prepared to make the way around tourist crowds to take the best shots of the bend. Bring the widest lens you have for the camera!

horseshoe-bend-usa-road-trip-arizona-travelOnce we got satisfactory amount of jumping photos like the one above, we headed west on Route-89 passing through Paria Canyon in Grand Staircase-Escalante National Monument and Kanab onto Road-9 for
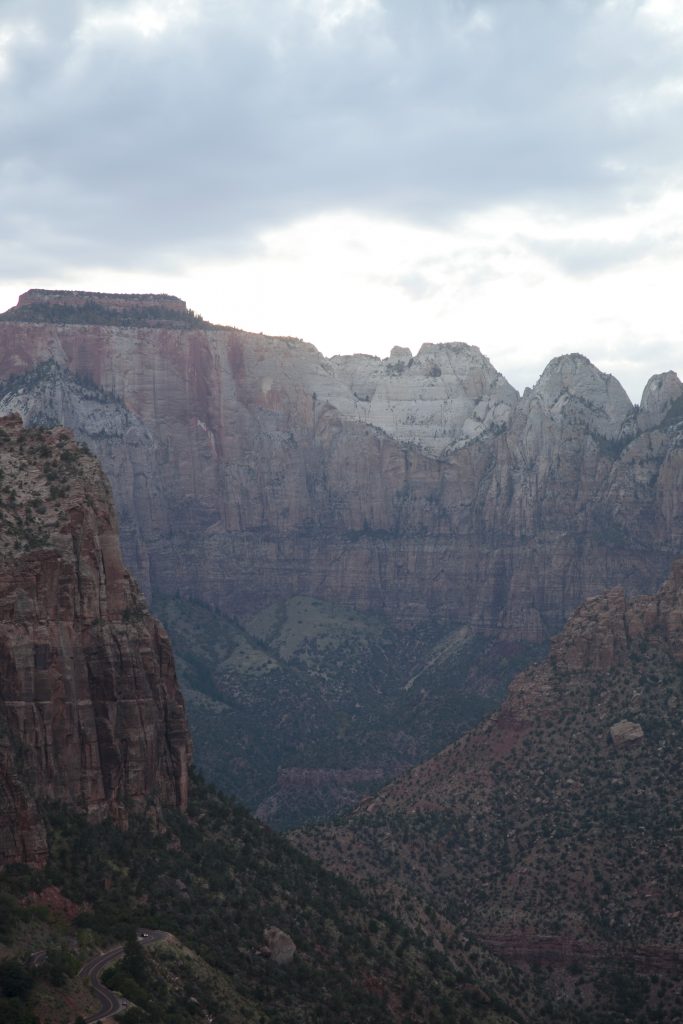
 Zion National Park.

zion-national-park-usa-road-trip-utah-travelZion National Park

I must confess that Zion National Park is my spiritual garden and my absolute favorite National Park in the country. I was here last year on the New Years for impromptu hiking to Angel’s Landing and that trip has permanently turn me into high mountain hike demon. Although we only had few hours until sunset to spend in Zion this time around, any opportunity to return to this beautiful park is blessing and makes me happy.

One of my goals on this road trip was to collect all the park patches at visitors center. I have yet to decide what to do with the patches, but it is something in my mind for future projects (maybe I’ll come up with some big banner with all the patches and use it for National Park themed parties). We stopped at visitor’s center where we were welcomed by baby deer and gift shops for souvenirs. At the shop’s register, a girl told us there is a nice hiking trail called Canyon Overlook Trail (here’s great trail summary) for sunset view of Zion Canyon. We nodded in unison: “Why not?” So we spent another hour shopping and headed to the east side of park for sunset hike.

zion-national-park-usa-road-trip-utah-travelCanyon Overlook Trail

Trailhead to Canyon Overlook is located by the exit of second tunnel (counting from west as you are driving up from Visitors Center toward east entrance). There is a parking area across the street from trailhead but the space is quite limited. We drove on Road-9 for another 1/4 mile to find a reasonable turnout to park. As we parked the car, a family of mountain goats sprinted out from the bush to welcome us to their home.

zion-national-park-usa-road-trip-utah-travelCanyon Overlook Trail is 1 mile out and back trail that consists mostly of incline through the mountain ridge. If you are hiking on this trail close to sundown, make sure to bring head lamps and maybe hiking sticks if you have them. Moon was out this day and once we reached the summit the canyon was ready to melt into pastel colors of dissipating daylight.

If you have limited time in Zion National Park and only have time for one activity, I will definitely recommend Canyon Overlook Trail. A view from the summit is simply breathtaking and gives you full perspective of this spectacular national park. I love Zion, and I shall come back again soon for more outdoor activities here.

zion-national-park-usa-road-trip-utah-travel
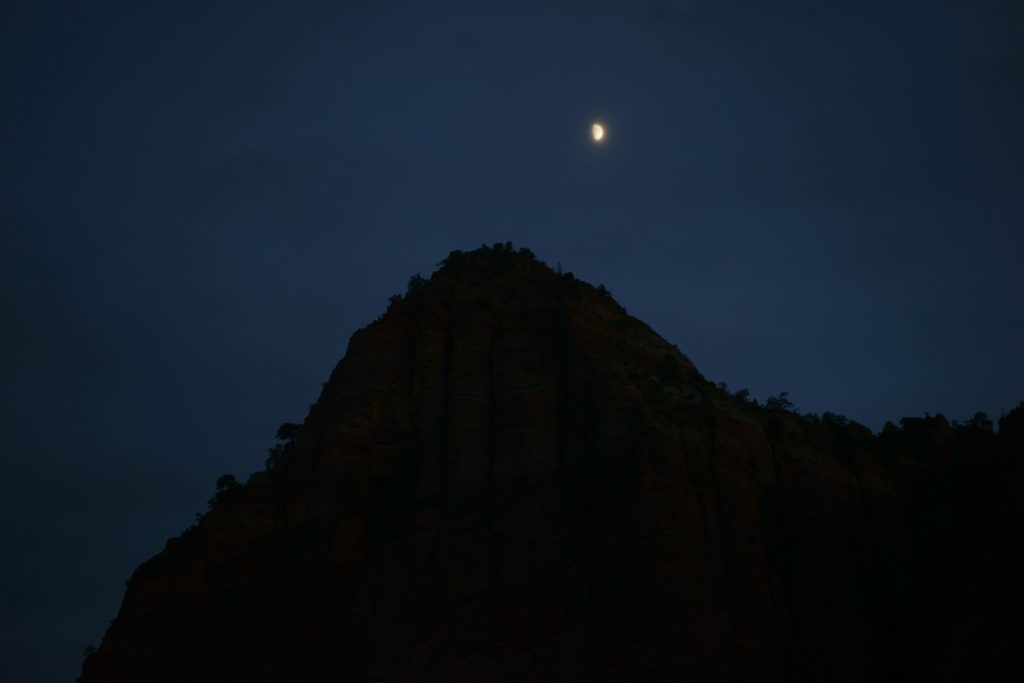
We exited the park from the east entrance and drove north to Panguitch, UT for the night’s lodge. Next, we will visit Bryce Canyon National Park.

(to be continued)

★JUMP TO PART 1 :: ARCHES & CANYONLANDS NPS!★

★JUMP TO PART 2 :: ROAD TO MONUMENT VALLEY!★

★JUMP TO PART 4 :: BRYCE CANYON NATIONAL PARK!★

★JUMP TO PART 5 :: CAPITOL REEF NATIONAL PARK AND BONNEVILLE SALT FLATS!★

★JUMP TO PART 6 :: YELLOWSTONE NATIONAL PARK!★


Useful Links:

Ken’s Tour (Tour company I used for Lower Antelope Canyon)

Some fun fact about Horseshoe Bend

Comprehensive guide for hiking in Zion National Park

Most epic hike in Zion NP: Angels Landing (If you dare!)