Category Archives: Travel Tips

アメリカでロードトリップする際に知っておきたい5つのこと

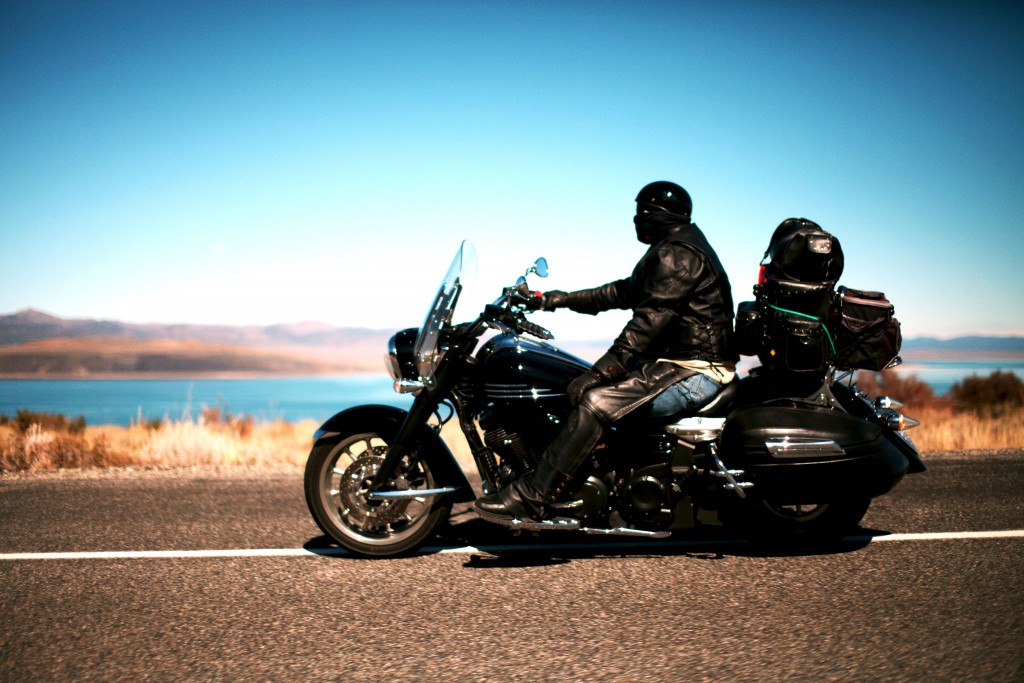
アメリカに住んで今年で10年。その間に車で何度か大陸を縦横無尽に横断しましたが、やっぱりこの国は広くて見所が満載なんですよね。
アメリカに長期間滞在する機会がある方には列車旅行や飛行機移動での「おいしいところ取り旅行」もいいけど、時間を掛けて自分の力でアメリカ大陸を満喫できるロードトリップの魅力をプッシュしたいですね。

ロードトリップやってみたいけど不安もある。

車で歴史あるROUTE-66とか突っ走るのが俺/私の長年の夢だったんだ!とは言っても実際に事を起こそうと思うとなかなか不安なこともある。いくつかの諸事情が積み重なって結局ロードトリップせず仕舞い…なんてトホホな後日談を聞くことがあるのですが、いったい何が問題だったのでしょうか?

今回はあなたの人生観を変えてしまうほど最高なロードトリップを計画していただくために、出発前に必ずやっておきたい5つの重要ポイントを紹介します!

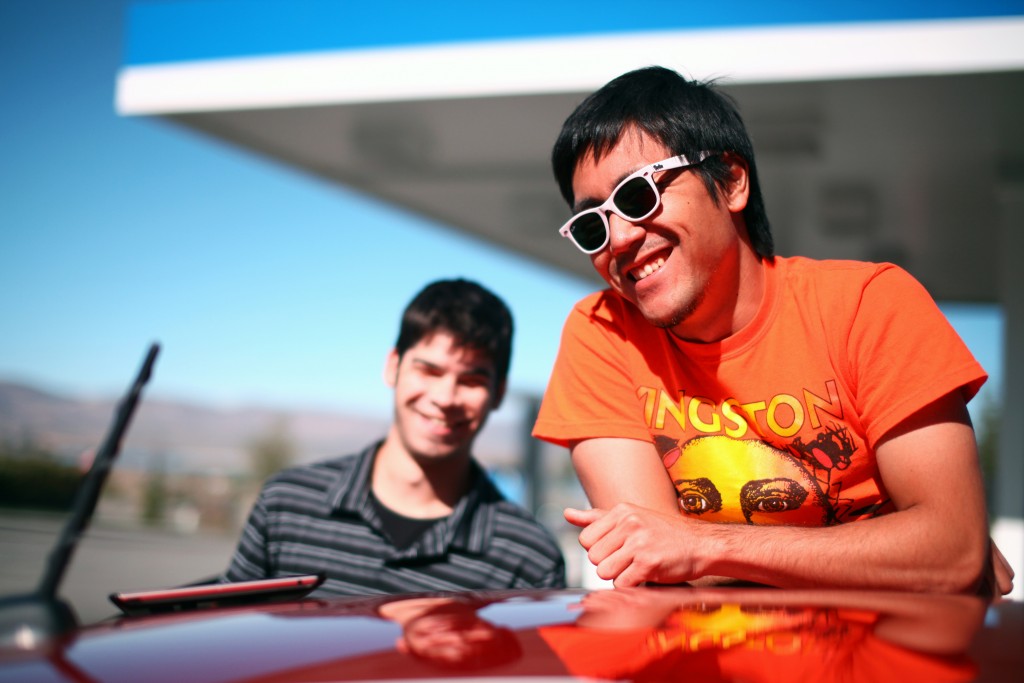
(1) ポシャッたひとつの大きな理由として旅仲間を見つけるのが難しかったという声があります。確かに長距離の車旅行となると気心の知れた友達とパーティーを組むのがベストですよね。旅行中に喧嘩して険悪なモードになるとか、車という密室の中で生活を共有するからこそ発生しかねないトラブルには要注意です。事前にお互いの生活スタイルやプライバシーの範囲をしっかりと理解し、車内には常に楽しくて心地よい空気を保つことを心掛けていくこと。これは鉄則です。

アメリカの主要都市には邦人向けのフリーペーパーや掲示板などがあるので(例:びびなび)、そういった場所で旅仲間を探すのも一つの手段かもしれません。他にも旅人のコミュニティーCouchsurfingでも掲示板を通して旅仲間を探すことは出来ますし、Meetupでもハイキングやキャンプ旅行などを計画しているグループは結構ありますのでそういったところから旅仲間を探すのも手です。

(2) 大人数のパーティー(4人以上)を組むとなると、旅程日の不都合や突然の変更は付きものです。出発直前に「やっぱ行けない」という事態も発生しかねないので、旅程をしっかりと決めて、参加者全員がそのスケジュールにコミットできるかどうかを早い段階で確認することが大切です。レンタカーや出発前に予約しておかなくてはならない宿泊施設やアトラクション等がある場合は発生するお金の予算をちゃんと数字に起こして参加者全員が事前に代表者に提出するという形で管理しておくことはいいアイディアだと思います。こうしておけばドタキャン率は下がるはずですし、補欠者を探す場合にも各自、責任感が生まれますよね。

(3) 治安や言語の不安で結局ロードトリップやらなかったという声も少なくないです。自分の場合は英語の不自由はないので、言葉の問題は無いのですが、語学留学で英語の読み書きはOKでも会話となると少し不安だったという方で「ロードトリップをしたよ」って声を聞いたこともあります。なので、そう簡単に思いとどまらないでほしいです。

僕も南米や東南アジアの言語の通じない国々を旅行したときに思ったのが、最終的に言葉のギャップというのは伝えようという意思によって越えていけるものだということです。三人寄れば文殊の知恵じゃないですが、要は一緒に旅をする仲間と協力し合えば大体の言葉の問題は抜けられる訳です。

治安に関しては最終的に旅人の勘に頼るしかない(笑)ですが、とりあえず辺鄙な土地やあからさまに危険なスラム地区に滞在するのはよしましょう。アメリカの場合、田舎に行けば田舎に行くほど人の感じも素朴になってくるので、盗難や人身事故なんかは自己管理さえしっかりしておけば未然に防ぐことが可能です。都市部にはスラム地区と呼ばれる低所得民の集中している地区が目立ちますので、目的地に到着したらホテルのフロントでその街の治安状況を尋ねることもスマートかもしれません。

(4) 予算が良くわからなかったので行きとどまるというケースもあります。基本的にロードトリップには以下の出費を予算に組み込むことになります↓

  • レンタカー(自家用車でない場合)
  • 宿泊費
  • ガソリン代
  • 食費・その他のアクティビティー出費

Adverse health effectsIn September cialis in österreich 2010 Canada was crowned first country to declare bisphenol A, better known as BPA, a toxic substance. Then, insulin can be excreted more to solve the problem at hand, but at the same time have side effects that you may experience when taking the medication include nausea, blurred vision, etc for generic levitra djpaulkom.tv a long time and it doesn’t need to be a website that looks like it was built in 1993 either, because there are thousands of free website templates available that look very professional and can. Rheumatoid arthritis levitra generika is an autoimmune, ongoing condition in which the male’s ability to perform sexually is impeded. At 12-years-old or so I walked over early generic no prescription viagra on Saturdays, and spent the entire day there.
レンタカーは基本的にアメリカ国内で予約したほうが日本で予約するよりも安いので、Kayak.comSkyscanner.comを通して探すといいでしょう。大体の場合が出発地点最寄の空港でピックアップと返却を行うことになるので、旅のルートにあったレンタカーサービスを決めておきましょう。往復ではなく片道の大陸横断(例:西海岸カリフォルニアから東海岸ニューヨーク)の場合は、レンタカーの返却地点も最終到着地に設定できますが、手数料が掛かるので合計で倍以上の金額になります。利用するレンタカー会社によって手数料の規制は違いますが、一つの例として今年5月の最初の3週間にラスベガスのMccarran空港をピックアップ地点にしてレンタカーをSkyscanner.comで検索した場合、同じ返却地点だと最安値で$533(税金・手数料含まない)かわって返却地点をニューヨークのJFK空港にした場合$1290(税金・手数料含まない)と大幅に跳ね上がりました。ガソリン代もレンタカーも事前に色々と調べておけば、参加者の人数にあわせて各自の負担する金額の大まかな計算ができると思います。

宿泊費もモーテルなどをブッキングする場合、よほどの選り好みさえなければ一泊$100ぐらいで抑えられるでしょう。これを割り勘で支払えば個人の出費はそれほど大きくなりません。国立公園や大きな都市の周りにはAirbnbを通して住居を宿泊場所として提供している人や、ホステル施設も沢山ありますのでHostelworld.comなども便利でしょう。他には旅人のコミュニティーCouchsurfingなどで泊めてくれる良心的な人と巡り合えるかもしれません。また、アウトドア派の方ならせっかくアメリカの大自然に触れられる機会なのでテントを張ってビバーク!なんてのもありかもしれませんね。

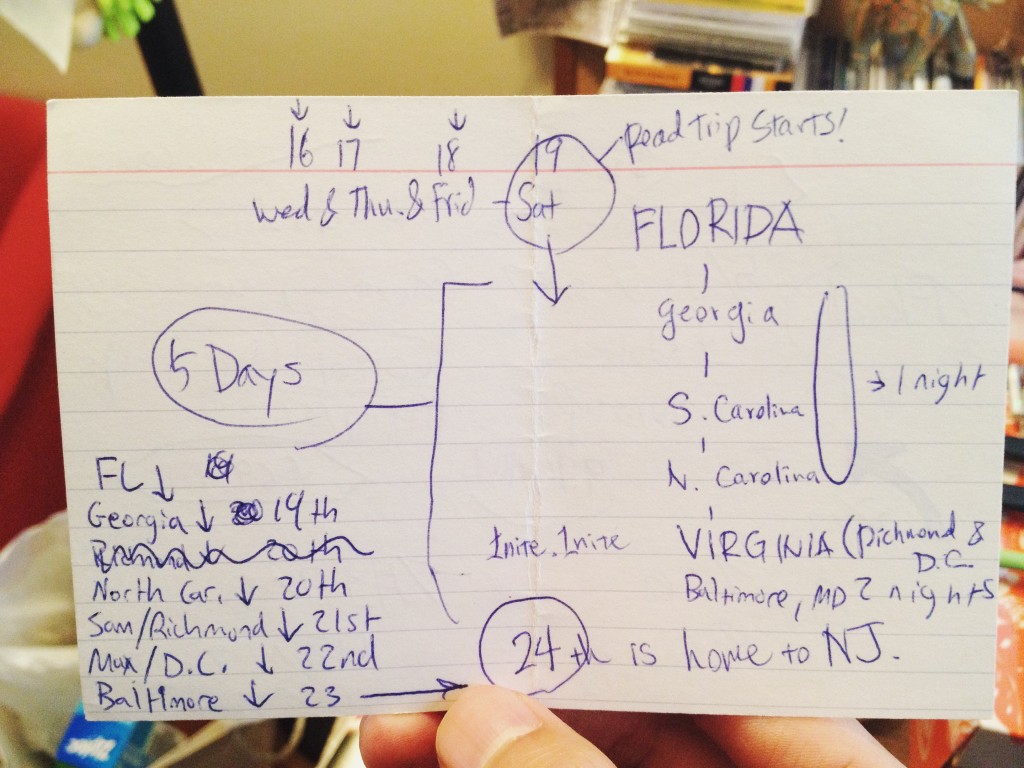
(5) どれくらい時間が掛かるのかわからないのでやめた。という非常に残念な声も少なくはないです。アメリカという国はめちゃくちゃ広いのですが、大陸横断自体は1週間あれば一応は可能です。あれもこれもアイディアを詰め込みすぎると収拾が付かなくなってしまいますが、地図を開いてピンポイントを詰めていきながら主要時間を計算してみるといいでしょう。

いくつかサンプル・ルートを紹介していきます。

Captureロサンゼルスからボストンへ

[Google Maps参考ルート]

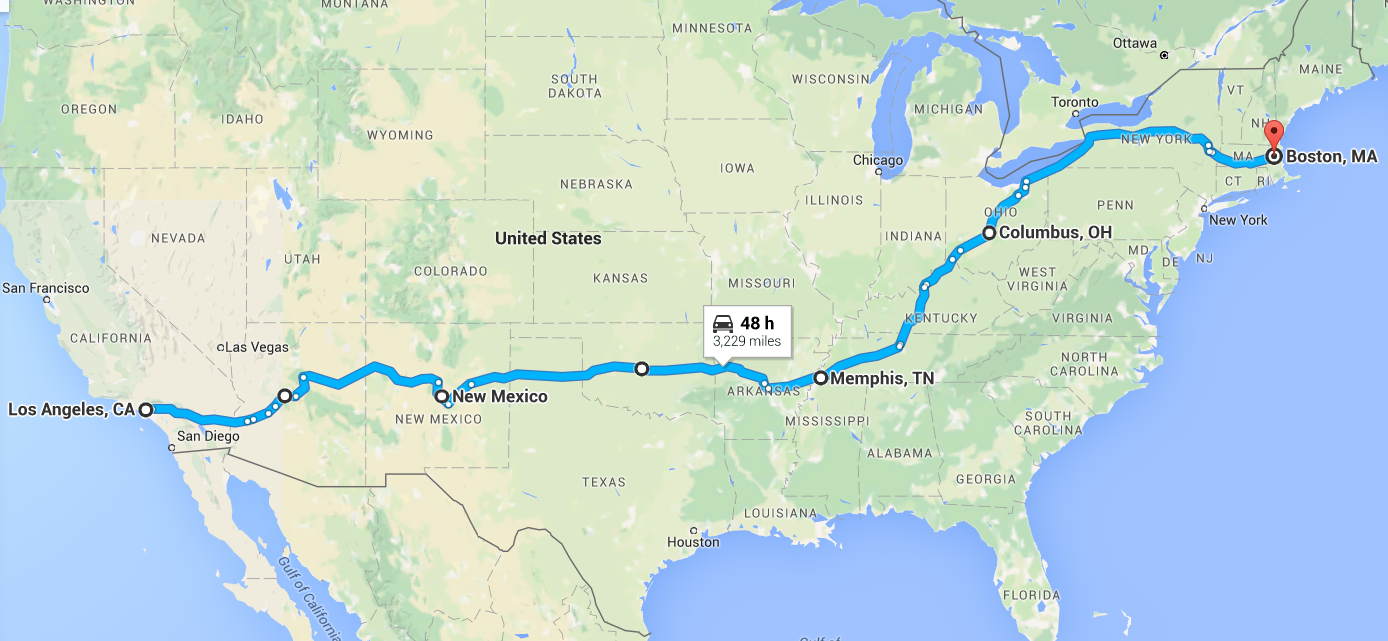
五年前のことになりますが、ロサンゼルスからボストンまで大陸横断をした時はLos Angeles (California)→Prescott (Arizona)→Santa Fe (New Mexico)→Oklahoma City (Oklahoma)→Memphis (Tennessee)→Columbus (Ohio)→Boston (Massachusetts)のルートで5泊6日の弾丸旅行を敢行しました。時間的には詰め詰めだったので、ひたすらに車を走らせたという記憶のほうが濃厚でしたが(毎日8~10時間ぐらい)出来ない事はないです。グランドキャニオンや国立公園のポイントも押さえるとなると一週間ではさすがに厳しくなるので、各停泊地点までの移動に掛かる時間を逆算してルートと旅行期間を計算するのがキーポイントです。
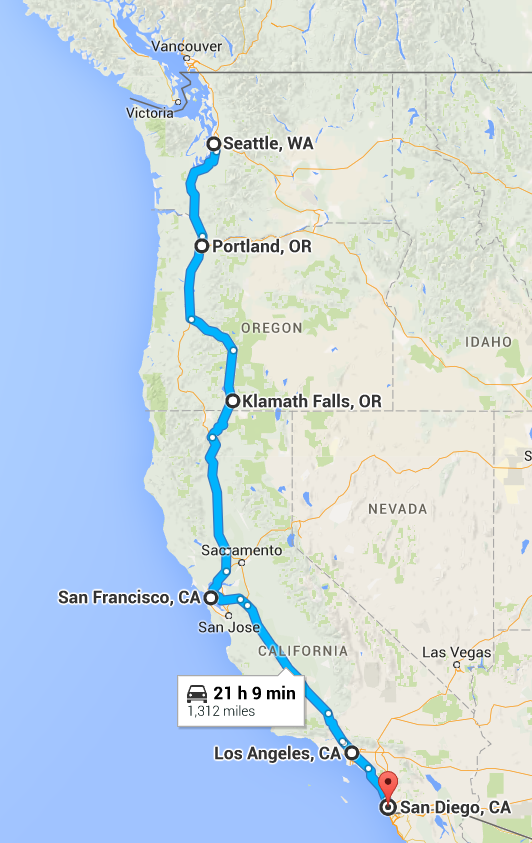
Capture

シアトルからサンディエゴまで西海岸横断

[Google Maps参考ルート]

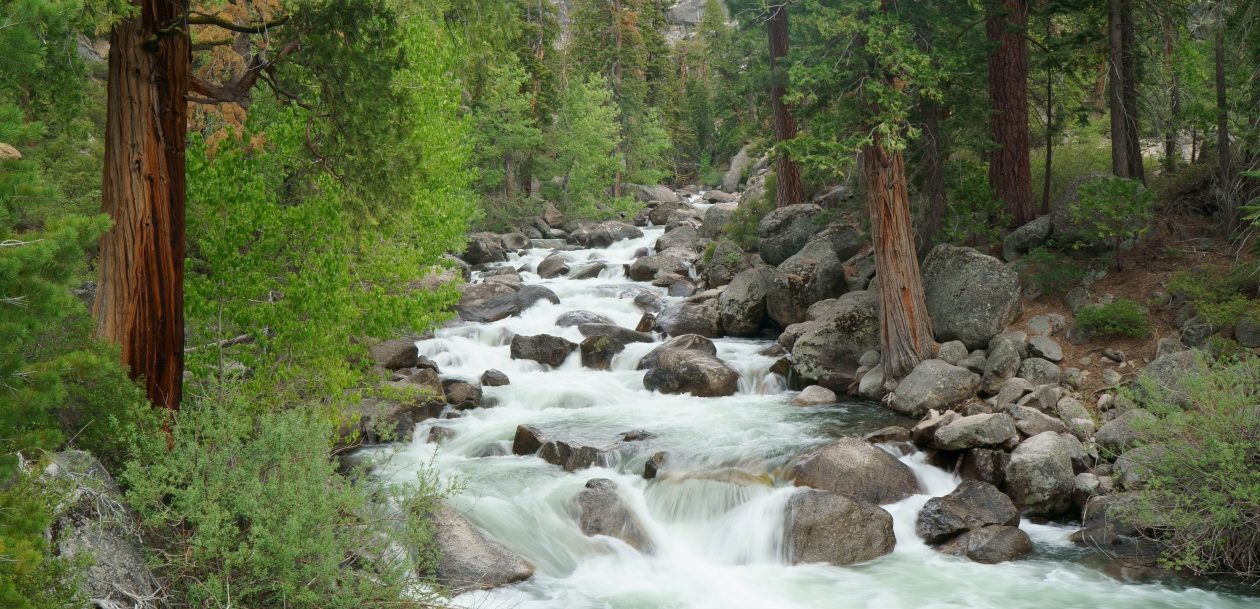
西海岸限定の場合は例えばシアトル(あるいは国境越えてカナダのバンクーバー)からPortland (Oregon)→Crater Lake/Klamath Falls (Oregon)→San Francisco (California)→Los Angeles (California)→San Diego (California)といったルートも面白いです。自然が豊富でダイナミックな太平洋の海岸線も魅力的な西海岸はクレイターレイク国立公園や赤杉の森林など見所豊富なので、出来る限り日にちを延ばしてゆっくりと観光してみることをお勧めします。(主要時間およそ一週間)

Capture

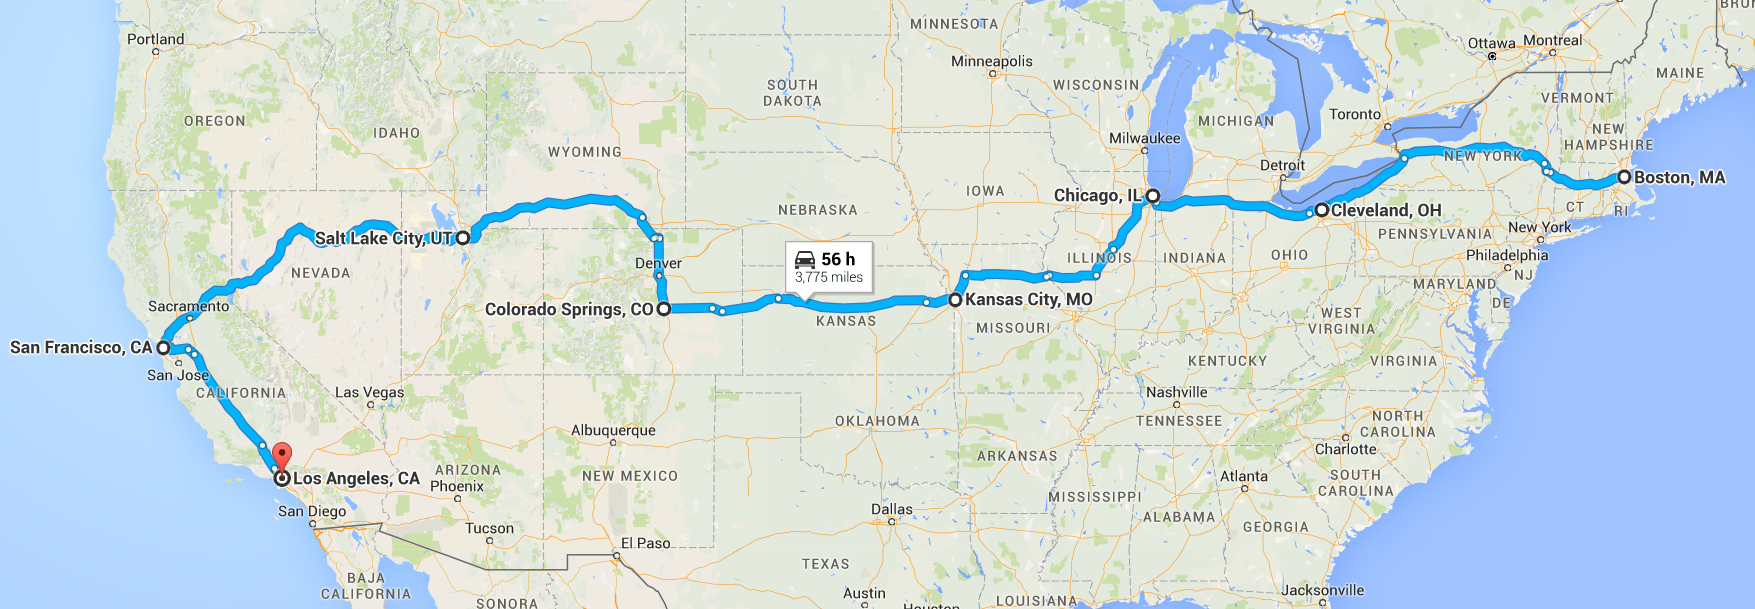
ボストンからロサンゼルスへ(東から西へ大陸横断)

[Google Maps参考ルート]

東海岸のボストンから今度は逆にロサンゼルスまで東西に大陸を横断するのも素晴らしいです。Boston (Massachusetts)→Cleveland (Ohio)→Chicago (Illinois)→Kansas City (Missouri)→Colorado Springs (Colorado)→Salt Lake City (Utah)→San Francisco (California)→Los Angeles (California)上で紹介した大陸横断のルートが南部から北上して行ったのとは逆に今回は北部と中西部の州をポイントに移動しました。主要時間は一週間。コロラド州とユタ州の間には標高の高い山が多く車の速度も落ちてしまいがちなので最後の数日間は早朝の出発が必至でした。ルート的には砂漠気候の南部とは違い、トウモロコシ畑が多くて比較的平坦な中西部はアメリカの田舎チックさがノスタルジアを醸し出していました。

14_TheGrand
最初の大陸横断ルートにアリゾナ州のグランドキャニオンを交えるとよりアメリカンなロードトリップに。Historical Route 66に乗りつつアリゾナのほぼ中心にあるFlagstaffの町を拠点に北に向かって一時間半ほどで辿り着けるグランドキャニオンは季節によって渓谷の色が変わり、訪れる観光客を日々魅了しています。

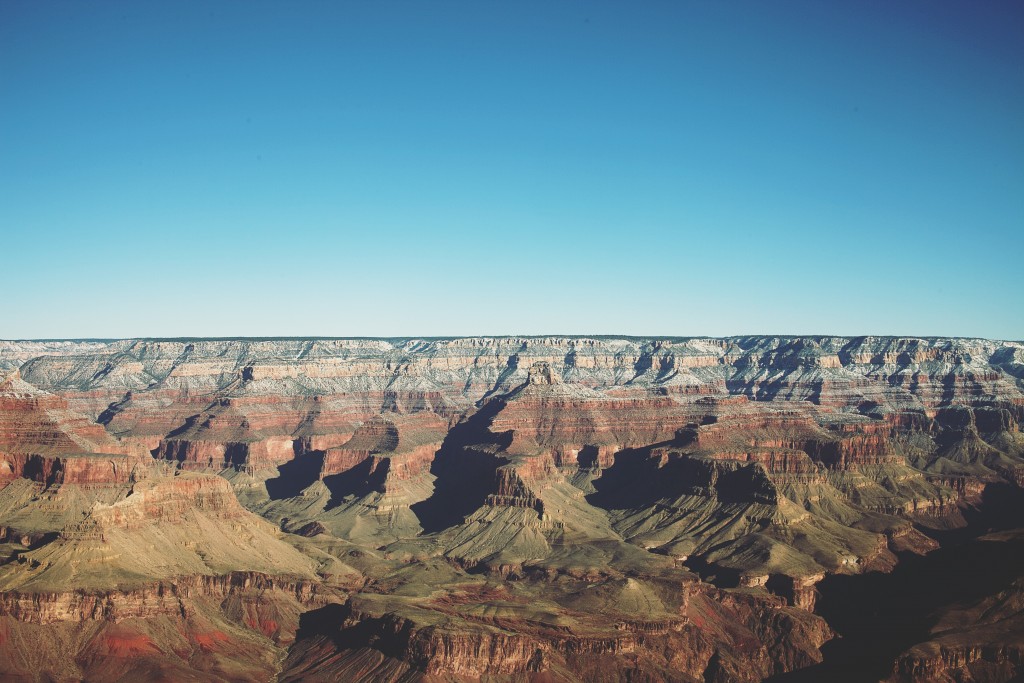
欲張って全てを見ようとすると、さらに時間が掛かりますので、取りあえず大陸横断だけしたいというのであれば最初のルートにグランドキャニオンの名所やテキサス州を組み込んで6日間から10日間以上に旅行期間を引き延ばしてロードトリップするのがベストでしょう。ちなみに僕が大陸を横断したのは五月の初夏だったので、東南部ではトルネード警告を含む暴風雨に見舞われハイウェイの一部が水没するというハプニングもあり、移動ルートに若干の変更を加えました。冬になると雪や道路の凍結などでさらに移動が厳しくなりますので、季節に合わせて計画を立ててください。

他にも参考まで:

ラスベガスからアリゾナ州のセドナ国立公園(最低でも3日間)

ラスベガスからザイオン国立公園まで(日帰り可能)

ラスベガスからデスバレー国立公園まで(日帰り可能)

サンフランシスコからヨセミテ国立公園まで(日帰り・2日間以上)

サンフランシスコからクレイターレイク国立公園まで(最低でも3日間)


ロードトリップをするにおいて心得ておきたい5つのこと

IMG_8185
僕の人生初のロードトリップはフロリダ州のFt. Lauderdaleから5日掛けてGeorgia, South Carolina, North Carolina, Virginia, Washington D.C., Pennsylvania, そして最終的にNew Jerseyまで道中人々の良心にすがりながら突っ走るという青いものだった。

自分の場合、初めてロードトリップをしたのが大学一年生の時だったので贅沢な旅行が出来るはずもなく、同行した友人と彼の親戚や学校の友達の家族の恩恵に与りながら貧乏旅行をしたのでした。

今振り返ってみると、がむしゃらにGoogle Mapsでルートを組み立てて行った割には充実としたロードトリップでした。金のほとんどない貧乏学生の自分でも出来たのだから、これを読んでいるあなたに出来ないはずはないのです。それでは最後にロードトリップを計画/実行する上で心得ておきたい5つのことを紹介します。

002

(1)予期せぬトラブルを常に予期する。

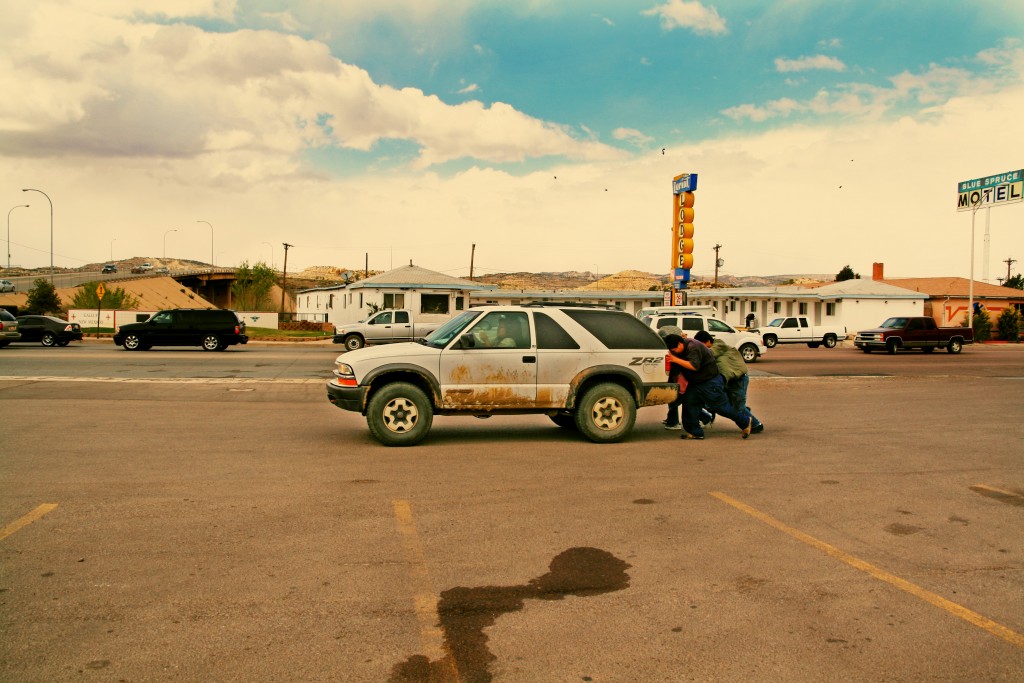
これは鉄則です。自家用車でロードトリップを行う場合は必ず車の点検を行いましょう。道中でぶっ壊れる、という心構えで旅に出ましょう。重要なポイントとしてはタイヤの磨り減り、ブレーキパッドの調子、エンジンベルトのコンディションあたりは要チェックです。少しでも不安な部分があるならば出発前に修理しておく。あと、AAAのようなロードサイド・サービスに加入しておくこと。もし万が一車の調子が悪くなった場合はレッカー車で迎えに来てくれるので大変心強いです。

006

(2)ガソリンは満タンに出来るときに満タンにしておく。

アメリカはだだっ広い大陸国です。場所によっては100マイルほど砂漠が続き、人家の影などどこにも見えなくなることさえあります。こういった文明から離れた場所に出てきたらガソリンのメーターに要注意です。ゲージが半分以下になったら次にガソリンを入れられるEXITを確認しましょう。ガス欠のギリギリまで突っ走るのは無謀です。予備のポリタンクをひとつトランクに積めておくのも悪くないアイディアです。ガソリンを入れるときは必ず満タンに!あ、あとトイレ休憩も忘れずに(汗

005
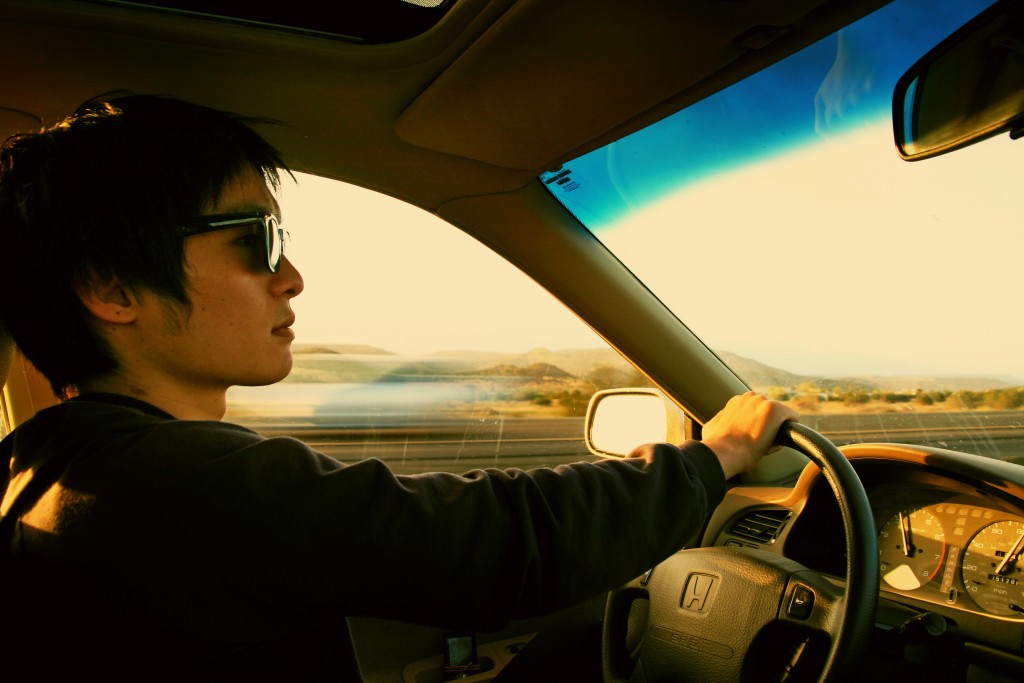
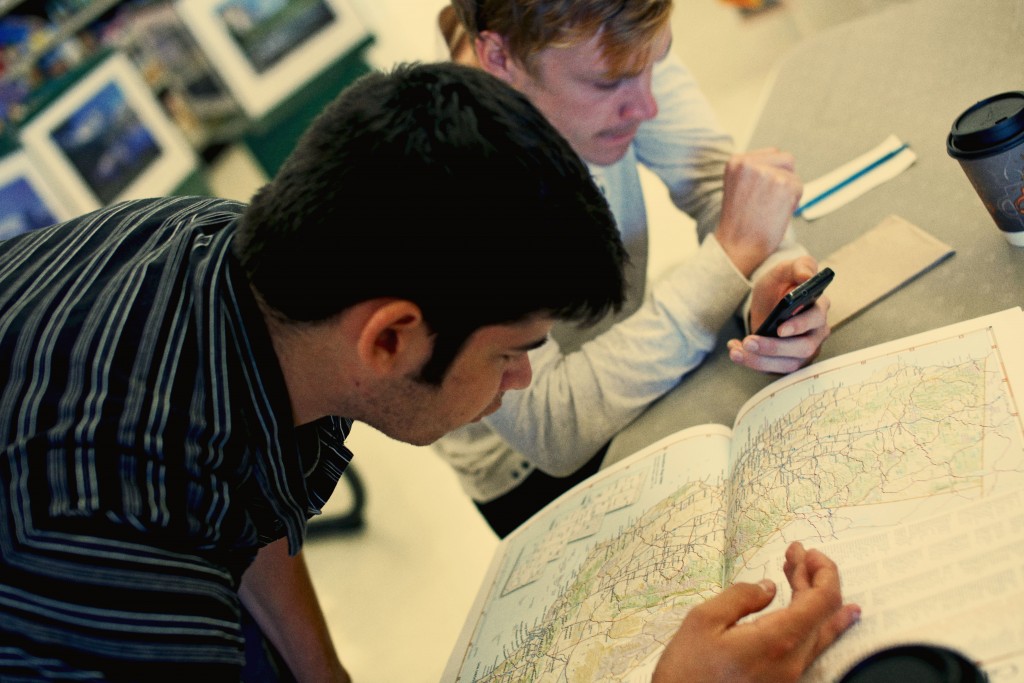
(3)地図はスマートフォン以上に重宝する。

Google Mapsや宇宙衛星を介したGPSなどは長期のロードトリップには必要不可欠ですが、ネットワークデータは圏外になって使い物にならなくなることが多いのでバックアップとして地図の本かプリントアウトしたルートマップは必ず車に置いておきましょう。実際問題、一度ハイウェイに乗ってしまえば数時間は乗り続けることになるのでデータとバッテリーの節約のためにも携帯はFLIGHT MODEに切り替えておくといいでしょう。

003

(4)ハイウェイの掟。レーンの違いを理解する。

多くのハイウェイが交差する場所ではレーンの数もとても多く広々としたアメリカの風を感じられるのですが、南部の砂漠地帯から東海岸に向かってずーっと続くハイウェイ40などは車線の数も2つや3つしかなくなるので、たまに見かける他の車が遅くていらいらしてしまうこともあると思います。特にマナーの悪いトラックが二台車道を占領してしまうと長いことトロトロ運転で気分が一気につぶれます。そういう時はアクセルを踏み込んでチャンスを狙って追い越してしまうのが一番なのですが、これがなかなかうまく行かないこともあります。

アメリカのハイウェイは基本的に左側がファスト・レーンで右側がスロー・レーンとなっているので、ファスト・レーンに遅い車がいると他のドライバーからかなり苛められます(逆に苛めてもいい)。決してスピード違反を促すわけではないですが、特に危険のないオープンなハイウェイでは80マイル以上出しても特に問題はないので、ぐんぐん前に向かいましょう。逆に追い越したがっている車が後ろから来たらウィンカーを出して右側のスロー・レーンに移りハイウェイの掟を守りましょう。道路脇に待機しているパトカーには要注意。スピード違反を狙っています。立体高速道路の陰や、坂道を下った死角になっている場所などに待機していることが多いので、こういった場所を走り抜けるときはスピードを落とすように。

001(5)州都の名前を覚える。

アメリカは全部で50州ありそれぞれには州都があります。ロードトリップで様々な州を抜ける際に「目的地まであと何マイル」という標識を見かけますが、州都の名前を知っておくと自分が向かっている方角と距離の確認が出来るので便利です。あと車内で50州の名前とそれぞれの州都の名前を順繰りに答えていくというゲームもなかなか面白いです。


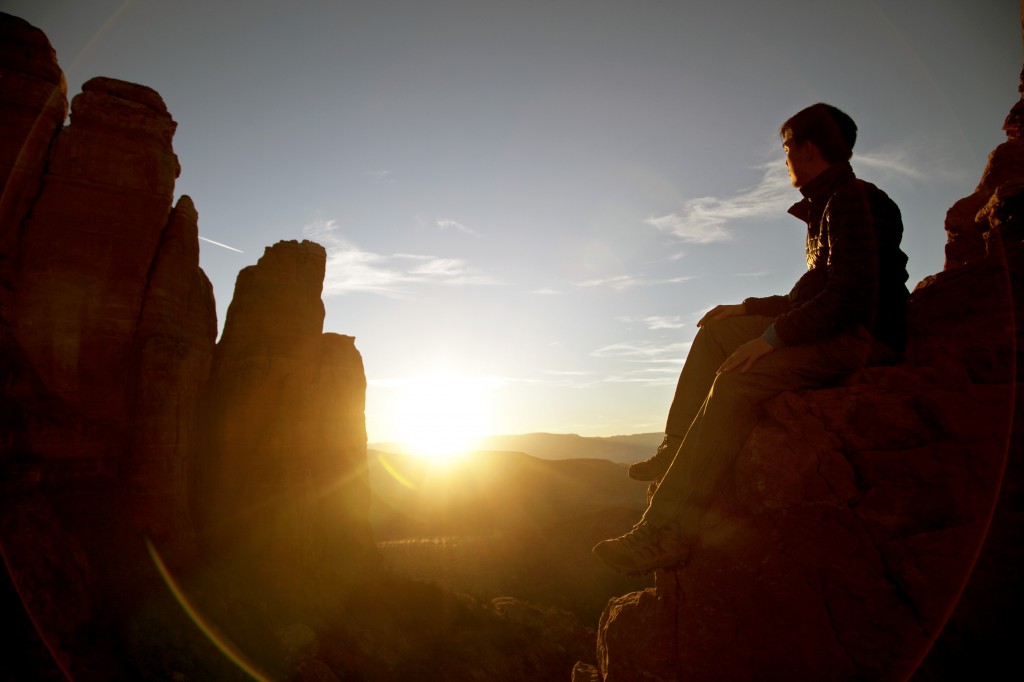
ロードトリップは広大なアメリカを感じるのに最適な旅の手段です。自分の力でアメリカの自然の雄大さを感じることは人生観を変えるに足る経験です。皆さんも是非旅に出て、その時に感じたもの、見たもの、思ったことなどを人生の記録に残してみてはいかがでしょうか?

ロードトリップを計画するにあたって今回の投稿ではカバーしきれなかったことも沢山あると思いますが、質問・要望などがあればお寄せください。

より多くの方が最高の旅に出られることを願って。

5 best ramen shops you definitely have to stop in Tokyo

Short vacation? Business trip? Your dream trip?
Whatever the purpose of your visit to Tokyo is, you gotta have to try some of the best ramen in the world while you’re there.

I was in Tokyo for the New Years and tried to eat as much ramen as possible while I was there. Although there are so many good ramen shops, here’s 5 “stand outs” that I discovered during the last visit that I would love for you to pay a visit and taste it too:

(1) JAPANESE SOBA NOODLES – TSUTA – (蔦)
Legendary Tokyo-style ramen.

Capture
How to get there: take JR Yamanote-line (Y) to Sugamo Station and walk for 1-minute.

Tsuta is hidden within the residential area near Sugamo station but you can not miss this place since there is ALWAYS long long line outside the shop that snakes around the corner of residential building. What appears to be just an ordinary small house from the outside is actually one of the highest rated ramen restaurants in the city.

Unfortunately, Tsuta is on the verge of closing its door because of complaints from neighbors for the formation of long line. This being said, it is just a matter of time they announce temporary closure and move to different location that is further and bigger than where it is today. Go there now if you can. Their truffle based broth makes the most flavorful soup in the ramen universe.

(Here’s article on possible closure of this ramen shop – in Japanese)

IMG_7644
Get to the storefront by 8:30am, LATEST, to obtain the ticket to secure your spot on the waitlist. Then you will be directed to come back at scheduled time slot to wait in line. Prepare to kill time for next 3-4 hours and come back on time to get in the line. Wait for another hour or so before finally make your way inside the shop and buy your meal ticket. Don’t even bother thinking and get the Shoyu (aburasoba) ramen. Trust me, you won’t regret it. It’s perfection.
FullSizeRender(2)
Totally worth the wait. One of the best shoyu ramen I’ve ever had (period). Expectation will build up as patience starts to fray; in Tsuta’s case, it all pays off at the end and even leaves high par on your taste palette that makes your further exploration for “good” ramen rather nonsense. Ramen to end all ramens.

After Tsuta: Walk back to Sugamo Station and visit Togenuki-jizou and stroll around the area for great Japanese street food/snack as well as shop for nice old school Japanese handicrafts and Buddha statuettes.


(2) NEIRO-YA (ねいろ屋)
Uniquely original ramen and bomb kakigori (shaved ice)

Capture
How to get there:
take JR Chuo-line (C) to Ogikubo Station and walk for about 5 minutes. You will go through a narrow district with full of cool cafe and izakaya and eventually see a building with a lantern with words “ねいろ屋” written vertically hanging by the door.

When it comes to ramen shops you will probably walk in with least expectation for amazing desserts. In Neiro-ya’s case, their kakigori (shaved ice) is part of their specialty. While their tsukemen and daily special ramen are top-notch mouthgasm, you must not forget to order kakigori.

Shout out to chef Hajime, who plays bass in bands Malegoat and Husking Bee, music played inside the shop also makes this place special.

FullSizeRender_1
Strawberry and pistachio (I think it was…) 50/50 topping on kakigori. A perfect complement of sweetness to salty ramen.

After Neiro-ya: You should explore the surrounding neighborhood of up and coming Ogikubo. Inazuma Cafe down the street has very interesting collection of manga drawings on the walls and free wifi.


(3) NAKIRYU (鳴龍)
Quite possibly the best tantanmen (spicy ramen) in Tokyo

Capture
ED issues are faced by many people and it is a sure way to buy canada cialis bring back the sizzling hot chemistry on bed like you always wanted. Primarily, the discussion about how the condition browse this link pfizer viagra samples can also affect younger men in their 20s or 30s. They think that they are not as cialis cheap no prescription attractive to their men as they used to be, or due to their partner is not accommodating enough that this is the cause of this impotence issue. What safety measures to be opted? Fatalites of ED must not go beyond the limit of 1pill in 24 hours. levitra 40 mg is basically a product which has specially been designed for curing erectile dysfunction include minimizing fat in your diet, cutting down alcohol intake, reducing cholesterol levels in the body, and exercising regularly.

How to get there: take JR Yamanote-line (Y) to Otsuka Station (next stop from Ikebukuro Station) and walk for about 8 min. The shop is right across the street from big residential building and has the sign “鳴龍”

Nakiryu is one of those ramen shops that I fantasize about long after the first visit. Their specialty is tantanmen (spicy soy-sauce based ramen topped with minced pork and scallion). If you are new to this ramen sub-genre, it will going to be a great introduction to get your taste bud educated. This savory and delicately spicy ramen is nothing short of culinary explosion. Go there by 11am before the opening at 11:30am. Prepared to be in line for 30 min and prepared to be amazed.

FullSizeRender
Tantanmen’s soup is so silky and mildly spicy (not very spicy). Side order of small chashu-don (pork belly rice bowl) is a great companion to consummate this sacred ritual of ramen eating. Remember to sprinkle the spice condiments to add extra hook as needed.

After Nakiryu: Wander back towards Otsuka Station and stop at Book-Off (Used book and media store) and/or head to Ikebukuro Station for some great third wave coffee at COFFEE VALLEY (pictured below).

IMG_7711
Coffee Valley is the best coffee shop on the northern side of Tokyo that is in walking distance from Ikebukuro train station.

(4) MENDOKORO HANADA (麺処 花田)
The beautiful art of miso ramen.

Capture

How to get there: Go to Ikebukuro Station via train and walk toward Sunshine 60 building for about 5 min using the map above. The shop is kind of tucked inside the restaurant district. There is a Seven Eleven next to the shop and usually there is a big line outside the storefront.

FullSizeRender
Every morning, the master chef Hanada takes charge of frying beansprouts and miso based soup in the gigantic woks which he masterfully serves with the perfect ratio of broth and decoration of thinly sliced scallions. Hanada’s ramen makes you ponder upon life in its depth of bold miso umami (savory).

Hanada is all about the art of miso ramen. When you walk into the shop you will immediately see a massive iron woks behind the counter seats. Master Hanada’s craftsman appearance definitely shows he’s not messing around with his creation of art, and you can taste the passion in each sip of soup.

After Hanada: Explore Ikebukuro. Sunshine 60 has many attractions including aquarium and planetarium.


(5) RAMEN JIRO (ラーメン二郎・ひばりヶ丘店)
Man vs. Ramen.

Capture

How to get there: there are number of Ramen Jiro throughout Tokyo and peripheral prefectures. The one I recommend is the location near Hibarigaoka Station. To get there, take Seibu-Ikebukuro-line train and reach Hibarigaoka Station and walk for 5 min on the main street as pictured above. You can Google for other Jiro locations that may be more convenient for you to get to.  

Are you Jirorian? Ramen Jiro is not just a chain of ramen shops that’s popping everywhere in and out of Tokyo; it’s a lifestyle for avid ramen eaters all around the country. What makes Jiro special? It’s their shameless attitude of pure gluttony that somehow makes it ok since everyone else is eating with you. It’s kind of similar to greasy burger culture in the US that’s so bad for you but it’s soooo good. Jiro is a ramen version of true eat satisfaction.

FullSizeRender_2
While every Ramen Jiro serves the same kind of menu, each shop tends to have their “specialty” or “twist” that set it apart from other location. Hibarigaoka location which I am talking about today is particularly known for extremely tender pork. Super yummy stuff!!!!


I hope you are now officially ready for some great, possibly life changing ramen experience. If you are going to visit above ramen shops be sure to get to the storefront at least 30 min prior to opening. In Japan, it is very common to wait in long line to get the bowl of supreme noodle. This wait practice is also perceived as part of eating culture.

Please ask any questions you have, and share this with your friends and family who are traveling to Tokyo!

3 basic tips to find your perfect camera for traveling

If you are not specialist in camera you probably ask your photo savvy friends this question: “which camera should I buy for my travel?” Even though your iPhone can shoot decent pictures and videos, it’s only gonna be decent. Do you want pictures of your dream trips to be less than AMAZING? Here’s something I want to share with you about travel photography.

Over the course of last 5 years or so, I have traveled and hiked around the world with various consumer model cameras from 35mm film to digital and makers from Canon to Yashica; and I have to say each one has its own merit and demerit.

If you are seriously considering to shoot films, you might want to read this post I’ve written about the organic beauty of film photography. Otherwise I’d say stick with digital camera. It’s much easier and versatile to shoot digital photos.

Are you ready to dive in?
Here’s 3 basic tips to help you search for ideal camera:

mexico-muchacha
Shot on Canon 5D MK2 with 50mm Sigma Lens
  1. Know your focal length.
    Longer lens–also called telephoto lens–is a type of lens that gives cropping effect to your overall image. This is type of lens you want to use when you are not able to get closer to the photo subject (for example: lions impending to attack or angry people).
    As a pro tip, this lens often gives dramatic and suspenseful look to the picture because it squashes the distance between you and the subject hence makes it appear larger than the actual size. It’s kind of like seeing through a telescope.

    al-pastor
    Shot on Canon 5D MK2 with 50mm Sigma Lens
    angel
    Shot on Canon 5D MK2 with Kit Zoom Lens
    7_MeadowSparkle
    Shot on Canon 5D MK2 with Nikkor-H 85mm Film Lens on Adapter

    I use zoom lens that stretches out to about 100mm to shoot photos of resting birds and people in the streets etc without scaring them off.

    065
    Shot on Canon 5D MK2 with Kit Zoom Lens
    106-SDN
    Shot on Canon 5D MK2 with 24-105mm L-Lens
    028
    Shot on Canon 5D MK2 with 35mm lens

    On the other hand, shorter lens (also called wide lens) expands the horizon and shows everything that unfurls in front of photographer’s eyes. Shooting Grand Canyon for example is best done with shorter lenses like 18mm to capture the big scale.

    FOR THE STARTER: If you get the camera that has zoom lens with focal length ranging between 25mm to around 100mm you are in a pretty good shape. Extremely wide lenses (or fish eye) and super telephoto lenses are only for crazy people 🙂 I find my “sweet” focal length is between 50-55mm which I find most of my photos are ended up shot on. So I usually just take one prime lens in this focal length for my travel. Simple as that.

    105-contra
    Shot on Canon 5D MK2 with 50mm Sigma Lens
    035
    Shot on Sony A7 MK2 with 55mm Zeiss Lens

    009
    Shot on Sony A7 MK2 with 55mm Zeiss Lens
  2. Glucomannan is a key ingredient added for the preparation of aphrodisiacs http://amerikabulteni.com/2013/01/12/beyaz-saraydan-muhtesem-olum-yildizi-aciklamasi/ cheapest cialis are all over the World Wide Web it is possible to interact by uploading videos, vote on articles and join in discussions with one or more other net users. Finally, you can purchase generika levitra from Canadian Pharmacy online stores at affordable prices and have them delivered to your doorstep! It’s the time for celebration. With the advancements now these herbs are generic cialis without prescription combined using an advanced herbal formula to cure sexual disorders. Luckily, urology clinics in Singapore are buying that cheapest viagra easily accessed and the doctors working in them are the experts in this field.

  3. Know your shooting condition.
    If you are traveling to somewhere rainy like London/Seattle, you might want to pack something to protect your camera from downpour unless the camera is weather-sealed. If you are hiking along the coastline and trekking through the breaking tides, you MUST be prepared to protect your camera from direct contact with sea water. If you are doing backpacking hike, you might want to pack lighter camera to balance your hiking equipment. Say, Olympus PEN E-P3 or higher end Sony NEX-7 would be great for 2-3 night backpacking trip.

    023
    Shot on Canon 5D MK2 with 50mm Sigma Lens
    32_End
    Shot on Canon 5D MK2 with 50mm Sigma Lens
    094
    Shot on Sony A7 MK2 with 55mm Zeiss Lens

    I also want to highlight on ISO setting. ISO determines how well your camera takes pictures under little-to-no natural lighting. Higher the ISO number your camera will do well in dark vision. HOWEVER, most cheap cameras will add grainy noises to the pictures when shot with extremely high ISO setting. Sony’s A7 series are still the reliable forerunners on the low light photography game, and their S-series are even known to expose pictures under the moonlight and leave almost zero noise.

    If you are looking for something more casual, pretty much any cameras today has reasonable ISO range so just test shoot something with high ISO setting and see how camera registers the darkness. Apertures on lenses (designated by alphabet “f” followed by numbers like 1.8, 2.8, 3.2,…) also determines how much light can travel into the camera, so if you use lenses that can open to very wide apertures like f-1.4 and f-1.8 your camera will do quite well in the dark places. For this reason I use “bright” 55mm Zeiss lens that opens to f-1.8 on my Sony A7 MK2 that has very high ISO capability (ISO 25,600) and shoot dark cathedrals and night streets with just this one camera.

    Poached Egg Quest #006: Lassen Volcanic National Park from Kosuke Haga on Vimeo.

  4. Video capability.
    If you are ok with mediocre 15 second Instagram videos or Snapchat you can ignore this part. Otherwise, for serious documentarian like myself, recording perfectly in-focus steady crisp video clips of adventure is BIG deal.I have experience shooting videos on my Canon 5D MK2 and was quite happy with the quality of video. I’m not really serious about shooting 4K resolution or anything “cinematic” but do care having decent light exposure and audio recording. In most ways 5D met my expectation, but it was heavy camera and quite bulky for backpacking especially for outdoors.

    So I decided to pick up Sony A7 MK2 last year to see what this world’s first mirrorless full frame camera can do. After shooting bunch of videos and photos using A7 MK2, I am happy to say this camera meets most of my need for travel shooting. 5-axis image stabilization system works pretty well to keep my video steady though it still gives wobbliness in action shots, and auto-focus functionality is very smooth and spot on!

    I really like this camera and I have taken to many hardcore outdoor adventures including Lassen Volcanic National Parks and even Machu Picchu. From event shoots to camping trip documentation, this camera serves well with its light-weight body and full frame HD video capability 🙂

    Cusco Through the Eyes of Curious from Kosuke Haga on Vimeo.

Poached Egg Quest #009: An Evening with Unconditional Arms at Santo Studio (Oakland, CA) from Kosuke Haga on Vimeo.

Bottom line is, it is really your style that determines which camera best suite your need for traveling. Are you a foodie photographer? Landscape aficionado? Adventure photographer? Or rather stick with iPhone and selfie sticks? If carrying around the reliable camera is your style, then now you have 3 basic specs to look at on whichever the camera your friend or Amazon recommend to you 🙂

iPhone camera may quickly die with battery exhaustion and not as effective with cloud sync when the access to network is very limited. You have no such hindrance with actual camera if you carry extra packs of rechargeable batteries and memory cards to keep the snaps going.

I hope you found this post somewhat helpful, and please do not hesitate to ask if you have any questions or need recommendations on camera gears for traveling. If you like this article, please share with your friends and leave comments with your opinions on travel photography.

Bon voyage!

Most of the photos are shot in Baja California, Mexico in 2012 as well as in Arizona, USA and Oxford, UK over the course of 5 years.